
How to Download Raw Data from the James Webb Space Telescope - Tutorial
- Antoine & Dalia Grelin
- Jul 14, 2022
- 7 min read
Updated: Sep 23, 2025
The James Webb Space Telescope is now producing incredible images of deep sky objects! NASA being such an awesome group of people, allow anyone to download all the data that the JWST produces... for free!
Downloading the data is a little tricky though... there is no big "Download" button anywhere on the page, and you'll have to fiddle with some code to be able to download the data. Let me tell you that I know nothing about coding and that I am terrible at using the Terminal, yet, I was able to get it to work, so you can do it too!
⚠️ Update: There now is a much easier way to download the data that does not involve the Terminal. Scroll down to learn more.
Thank you so much to my friend Patrick for helping me with this! You can follow Patrick on Astrobin to see his awesome images.
You can watch our video tutorial HERE.
Update: An Easier Way to Download the Data
First, go to www.stsci.edu to visit the page where the data is hosted.
Click on Advanced Search. It will open a window.
In the “Mission” box, type “JWST” if you’d like to download data from the James Webb Space Telescope. Press Enter so that the records update.
The easiest way to find an object you are looking for is to input its designation in the “Target Name” box. In Our case for the Carina Nebula, we’ll input “NGC 3324”. If you do not know your target’s designation, you can play with any of the other filters to find exactly what you are looking for.
Press “Search”.
On the left under “Instruments”, only let NIRCAM checked. You should now only have a few rows left, normally one for each filter used. In our case, six.
Click on the download icon on the left of each row to download the data.

Old Way
If you want to know the original way to download the data which required the Terminal, read it below.
Step 1 - Visit the JWST Data Release Webpage
The first thing you need to do is to go to the following link:
This is where you'll be able to find the data available from the JWST. Read through the whole page if you'd like, but, if you're like me and your brain is about to explode, simply ignore everything besides the "Table of Scripts" section.

At the time of writing this post, 5 data sets are available to download. Each set contains either a folder with the Calibrated files, the Uncalibrated files, or the Guide Star (not sure why you'd need that).
Click on one of the options available, and it will download a small file ending in ".sh". In my case, I chose to start with the "Calibrated" set of the Carina Nebula (NGC 3324).
Understanding this process:
The files you download from the website are not the actual data because of how massive the size of the sets are. Instead, think of these ".sh" files as hyperlinks to the full data access from the cloud. Our goal here will be to open our ".sh" file so that it can communicate with the cloud and then automatically copy the data to our computer.
Step 2 - Create a Folder on your Computer
This is likely an optional step, but I did this before messing around with the Terminal in Step 3, so I suggest you do it too.
The small ".sh" file of the Carina Nebula (or whichever object you chose) is now likely in your Downloads folder. Go ahead and create a new folder where you'll place your ".sh" file. I made a folder called "JWST". Name it like this too if you want to follow the next steps to the letter.
Step 3 - Give Permission and Privileges to the Folder
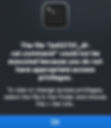
If we were to tell the Terminal to open our ".sh" file now, it would give us an error message telling us that we don't have the permission required to open the file and that we need to execute privileges. Well, if you think you'll be fine, you can skip to Step 4 and try it but you'll likely be back to Step 3 in a few seconds.
So how do we "execute privileges" for our James Webb Telescope file? Do the following:
Open the Mac Terminal window (Applications > Utilities > Terminal)
In the Terminal, type exactly "cd " (Yes, there is a space after "cd") and then drag the folder into the Terminal, that way it will automatically populate the directory. In my case, it looks like this: cd /Users/antoinegrelin/Downloads/JWST
Hit Enter
The Terminal is now "inside" your JWST folder.
Now, type or copy and paste exactly this: chmod -R +x *
All the files within the JWST folder will now have full permission/privileges.
If your ".sh" file is not in a dedicated folder, you should be able to give permission to it specifically without affecting any other files by typing: chmod 755 jw02731_dl-cal.sh as long as your Terminal is in the correct directory. Note that jw02731_dl-cal.sh is the name of the file for the Carina Nebula. If you selected a different object, be sure the name matches.
Want to learn all aspects of astrophotography in the most efficient way possible?

The Galactic Course includes a LIFETIME membership that gives you unlimited access to all current and upcoming astrophotography content. Step into an ever-growing realm of knowledge and learn at your own pace. Make life-long friends and connections with other members, and get tips from instructors that truly care about your journey and progress under the night sky.
Step 4 - Start Downloading the Data from the James Webb Space Telescope
Now, we are finally ready to tell our computer to download the files.
Take a quick look at the file in your JWST folder. If you downloaded the data for the Carina Nebula, it should have the following name: jw02731_dl-cal.sh
Remember this name.

Now in the Terminal, do the following:
Assuming you also downloaded the Carina Nebula data set, type exactly this: ./jw02731_dl-cal.sh
Hit Enter
The terminal window should now reset and you should see it being very active with text as it downloads the data from the cloud. Do not close this window until it is done.

The files are extremely large (hundreds of Gigabytes) so be sure to have enough space on your computer. To find the folder where the data is being copied, open a search window and type the ID name of your file. In my case, the folder is named: jw02731. You can right-click the folder and select "Info" or "Properties" to see its current size.
A Possible Way to Only Download the Important Files
There seems to be a way to tell the Terminal to only download the .FITS files and ignore all the other ones (.JSON, .JPG, etc) as these take up so much space! This method will not only save space on your hard drive but also make the download much faster. Thanks to Geert, who mentioned this in the comments section! This works for Max OS X by default, but also for Windows if you have installed "cygwin" first.
Here are the steps to follow as per Geert:
Open terminal
cd into directory where .sh file is downloaded (in our case jw02731_dl-cal.sh)
Enter command: vi ./jw02731_dl-cal.sh
Type the following vi command: :g/.json$/-1,+3s/^/#/
(this will comment out all the .json files download instructions)
Do the same for the .jpg files: :g/.jpg$/-1,+3s/^/#/
Save the file and exit by typing: :x
Thank you again Geert!
Step 5 - Process the Data from the James Webb Telescope!
Once the download is over, feel free to close the Terminal window and start processing the data!
I'll update this post with my images once they are processed :)
Q - "There are thousands of files and a bunch of different folders... I'm confused, which files are the ones I should load into my processing software?"
Allow me to quickly un-confuse you: You can ignore every file that you just downloaded, except for 6 of them in the "L3" folder. The L3 folder contains the masters that were already assembled into mosaics. The master files you are looking for should have "nircam" in the anme and end in "_i2d.fits".
The content of the L3 folder can be seen below (screenshot taken from the Southern Ring Nebula's L3 folder). The very first file you see is a master. The next one, ending in "_segm.fits" can be trashed. The bottom half of the folder where the word "miri" replaces "nircam" can also be trashed.
I have placed a star next to each master. There are six, one for each filter the James Webb Space Telescope used.

Once opened and stretched, they should look something like this (Carina Nebula):

My Version of the Carina Nebula
Below is my first attempt at processing data from the James Webb Telescope. I wanted to try getting a different result than the original, so I went with some bright yellow and blue colors. I like it!


I used PixelMath to combine the 6 channels into one color image. If you'd like to get the same colors to start with, the formulas I used are below. Just note that you will get a very green image and will need to play with color curves and/or SCNR to remove some green. You can also watch the video I made about processing this data.
If you'd like to download our full PixInsight workflow which includes several pages, full video walkthroughs processing monochrome data and our PixInsight shortcuts, click below!
Final Thoughts
It is so nice of NASA to share all this data with the rest of the world. If you did not know, they already were doing that with the Hubble Space Telescope data, but we are glad that they decided to keep this going with James Webb.
We'd love to see the images you processed, so feel free to add them in the comments section below!
Make sure to follow us on Facebook, Instagram, Twitter and YouTube to stay up to date with our work!
Clear Skies,
Galactic Hunter
GALACTIC HUNTER BOOKS


