
Beginner DSLR Astrophotography Equipment - A Complete Guide
- Antoine & Dalia Grelin
- Oct 28, 2019
- 31 min read
Updated: Aug 26, 2024
Beginner DSLR astrophotography can be intimidating when you don't know the basic equipment you need. In this article, we'll share every piece of equipment needed to start astrophotography the right way. Below we suggest several cameras, telescopes, mounts, and accessories that may fit your budget. Continue reading to find ideas on how to build your perfect Astrophotography rig.

Table of Contents:
DSLR Cameras for Astrophotography
Modifying a camera for Astrophotography
Camera Lenses for Astrophotography
Camera Tripods and Star Trackers
DSLR Camera Accessories
Beginner Telescopes
Motorized Equatorial Mounts
Power
T-Rings, Coma Correctors and Field Flatteners, and T-Mount Adapters
Auto-guiding
Accessories to Make Your Life Easier
Softwares
Alternatives for Astrophotography without Equipment
Astrophotography is, in our opinion, the most rewarding photography-based hobby of all! It is one of the most difficult niches to get into and can become quite expensive. Nowadays it's much easier to find online sources with thousands of tutorials, videos, and articles to help beginner astrophotographers get started.
Believe it or not, you can get decent photos of the night sky, including deep-sky objects, without spending thousands of dollars on gear. If you read our "Astronomy as a Couple" post, you may know that we started out with an old Point & Shoot camera and binoculars. We went through the wringer, but we don't recommend starting this way because your smartphone probably captures better images than our Point & Shoot camera ever did.
Shortly after that phase, we upgraded to a DSLR camera and a tripod. That was how we got our first great images of the night sky and the best place to start if you're interested!
Which leads us to the first question, "Which DSLR camera should you buy?"
Make sure to check out our complete guide on how to start Astrophotography! You can also join the Galactic Course for access to lessons about all aspects of Astrophotography!
DSLR Cameras for Astrophotography
Suggested Beginner Camera - Under $900

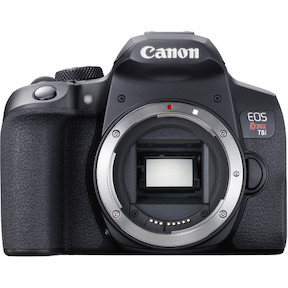


Canon EOS T8i (left)
Nikon D7500 (right)
These cameras have a relatively low price and are great for beginner DSLR astrophotographers on a tight budget, or those who are unsure they want to dive headfirst into the hobby.
We started with the "TXi" series for our first DSLR camera. It was a used Canon T3i, which we bought for under $400 at the time. If you follow our YouTube channel, refer to Episodes #1 through #4 to see the T3i's potential.
This cropped-sensor camera yielded excellent results for the price we paid and we appreciated the tilt-screen feature, which you can find in the newer Canon T8i as well.
The Nikon D7500 is similar and also has a tilt-LCD display. At the time of updating this blog, we saw a price reduction for it so keep an eye out. This camera is a great option for imaging the night sky without spending too much money.
Suggested Intermediate Cameras - $900 - $1500


Canon EOS 80D (left)
Nikon D500 (center)
Canon 7D Mark II (right)
These intermediate-level cameras are well known to amateur astrophotographers, as they have great low-readout noise and a high dynamic range. This feature is helpful when imaging deep-sky objects and the night sky in general, but comes at a higher price than the two previous cameras. In our opinion, it is worth the investment for devoted astrophotographers.

We used the Canon 7D Mark II as our main DSLR camera for years time until switching to the Canon Ra (now discontinued). We never regretted that purchase and have gotten magnificent images with very low noise.
If you are interested in filming with your camera, the Canon 7D Mark II also has great video capabilities. In fact, it is what we use to record our episodes!
Suggested Pro Cameras - $2000 and above


Nikon D810A (left)
Canon EOS 5D Mark IV (right)
Canon EOS Ra (discontinued)
If you are willing or able to splurge on astrophotography equipment for the long term, consider purchasing a high-end DSLR camera with excellent low-light capabilities, such as the Canon 5D Mark IV or the Nikon D810A. We were able to try out the 5D Mark IV once for Milky Way photography and it blew our minds! The noise level was extremely low, even at a very high ISO, and the Milky Way looked incredible after just a single 25-second exposure at f/2.8.
On the other hand… Nikon's D810A is the only DSLR camera dedicated to Astrophotography. This product was built to capture galaxies, nebulae, and other deep-sky objects. It even has an optimized sensor that is 4 times more sensitive to Hydrogen Alpha gas than other DSLR cameras! Nikon also advertises the D810A as an excellent camera for wide-field astrophotography, and has a feature dedicated to Star Trail photography!
During the holiday season of 2019, Canon decided to compete with Nikon's D810A and released the Canon EOS Ra, a mirrorless camera also build specifically for Astrophotography. Mirrorless cameras are getting more and more popular these days due to their smaller size and weight.
If you are in the same position we were in when we first started, you can only splurge for a quality camera, and that's it - but don't worry! You do not need a telescope (and all the accessories that go with it) to do Astrophotography.
Actually, it's better to start imaging the night sky with just a DSLR and a tripod rather than complicate your newfound hobby by trying to learn too many things at once and give up.
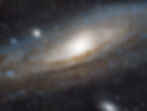
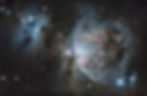
With the right lens and an affordable camera tripod, you can photograph the Milky Way, as well as some of the most famous objects in space, like the Andromeda Galaxy or the Orion Nebula. Sounds too good to be true? Check out our post about photographing deep sky objects with just a cheap DSLR camera and a tripod to convince you!
You may also want to read our tutorial post about the 15 easiest astrophotography targets without a telescope.
Spending a few months imaging the sky with a DSLR camera and tripod will teach you important skills for Astrophotography. You will not only learn how to use your camera, but also how to focus, how to find your target, how to use an intervalometer, and how the sky changes each season.
In order to get great results and stay motivated, you will need a lens fitted for nighttime imaging. Please note that if your camera has already come with a lens (usually the 18-55mm f/3.5-5.6 "kit zoom lens"), you do not necessarily need to buy a new one. The kit lens can yield great results, especially for wide-field imaging, and is often the lens most beginner DSLR astrophotographers start with!
Eventually, you will want to get a faster lens (f/1.4 to f/2.8) for your desired focal length or purchase a telephoto lens to get a closer photograph of deep-sky objects.
Modifying a Camera for Astrophotography
If you like the simplicity that DSLR and mirrorless cameras offer, and do not plan to upgrade to a cooled astronomy camera anytime soon, consider investing in a modified camera!
Astro-converted cameras will capture more data, especially in the hydrogen-alpha wavelength, and so are much better than stock cameras when imaging most deep-sky objects, especially emission nebulae.
The company we recommend, if you are interested in getting a modded camera, is Astrogear. We have tried a camera from them and were blown away!
You can either send your current DSLR or mirrorless camera to a professional for modding, or you can purchase a pre-modded camera.
Below is a picture of Barnard's Loop showing a comparison between a stock camera (left) and a modified camera (right).

We have a full guide about astro-modified cameras that you should read if you want to learn more!
Want to learn all aspects of astrophotography in the most efficient way possible?

The Galactic Course includes a membership that gives you unlimited access to all our astrophotography courses. Step into an ever-growing realm of knowledge and learn at your own pace. Make life-long friends and connections with other members, and get tips from instructors that truly care about your journey and progress under the night sky.
Camera Lenses for Wide-Field Astrophotography
Suggested Wide Angle lenses for Astrophotography
Wide-angle lenses are best used to photograph the Milky Way, for star trail imaging, or to capture meteor showers.


Canon:
Nikon:
Other:
Rokinon 10mm f/2.8 - This is the lens we use when shooting the Milky Way. It is fully manual (meaning you cannot autofocus or change the aperture through the menus) but is easy to use and yields great results for the price!
Suggested regular lenses for Astrophotography
These lenses can be used to get a closer look at the Milky Way band, photograph the constellations, and take landscape astrophotography.


Canon:
Canon EF-S 24mm f/2.8 STM (also called "Pancake lens")
Canon EF 50mm f/1.8 STM (also called "Nifty Fifty")
Nikon:
Suggested Telephoto lenses for Astrophotography
Telephoto lenses are often big and heavy but can zoom in well. This makes them really useful for imaging galaxies, nebulae, or clusters. If you can afford it, choose a lens that is as fast as possible, meaning it has a low f/ number - for example, an f/2 is faster than an f/5. What is the f/number exactly? It is the ratio of the focal length to the aperture diameter, which is how fast the lens collects light.


Canon:
Nikon:
Other:
At this point, you should have an idea for your camera and a choice of lens(es). Next and last, is the most crucial piece of equipment you need to be able to start Astrophotography, a tripod!
Camera Tripods and Star Trackers
Suggested Camera Tripods for Astrophotography
Tripods come in all sizes and prices, but we recommend avoiding the cheap and easy options.
Your tripod will serve you for years to come. It is necessary to have a reliable piece of equipment in the dark because you may bump into it and conditions change depending on where you photograph from! A sturdy tripod will make your life much easier when setting up and taking long exposure shots. It also helps to have a tripod that can support a heavy camera body and lens.
We have owned 4 or 5 tripods since starting our beginner DSLR astrophotography journey, and so far, there are only three that were worth the investment. From left to right, find out more about them below.


Orion Paragon-Plus XHD Extra Heavy-Duty Tripod
We purchased this tripod when we had our heavy 20x80 Orion Binoculars. This was back when we were just discovering the night sky and before we ever considered buying a DSLR camera. We had no idea it would become our main tripod when shooting the Milky Way, taking time-lapses and star trails!
At one point, we even attached a star tracker to the top of it, so it handled the tracker, a camera, and a heavy 75-300mm telephoto lens like a champ! We highly recommend investing in this tripod and we know we'll continue using it for many years. This is now our primary tripod for filming our videos.
The Orion Paragon-Plus XHD Extra Heavy-Duty Tripod has a weight rating of 10 lbs (although it seems it can handle more in our opinion) and can reach a height of 68 inches. It costs $149.99.
JOBY Gorilla Pod 3K

This may come as a surprise, but this tiny, flexible tripod is actually very sturdy! We often attach our Canon 7D Mark II + lens to the top of it and place it anywhere we like.
Of course, due to its size, you will be limited in terms of angles if doing landscape astrophotography.
You could place this setup on a sturdy branch or on top of your car to get more height, but it might make more sense to invest in the heavy-duty tripod instead.
The JOBY Gorilla Pod 3K tripod can hold up to 6.6 lbs and costs $69.95.
You can upgrade to the 5K kit if you prefer, which can hold 11 lbs, but costs $109.95.
Carbon Fiber Tripod
This is our main tripod for wide-field astrophotography! It has about the same size as the Paragon one but is significantly lighter thanks to the carbon fiber design. It's also faster to deploy and it can handle more weight.
We use this tripod whenever we shoot the Milky Way, and have no issue using our star tracker on it. We compare this Radian tripod with the Paragon tripod on our YouTube channel. We also give our first impressions of it and show you its features!
The Apertura Tripod can hold up to 110 lbs and costs $349.
Suggested Star Trackers for Astrophotography
Sky Trackers (or Star Trackers) are excellent for people who don't plan to image with a full telescope rig (yet). Star Trackers are lightweight, easy to use, and simple to mount making them perfect for wide-field astrophotography using a camera and lens. Some star trackers can also be used with a small telescope, but we recommend sticking with just a camera and lens when imaging with a tracker.


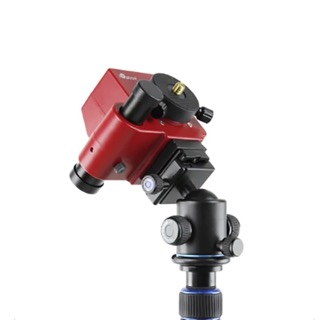
Pictured above are three star trackers we recommend:
Note: The SkyWatcher tracker is by far the most expensive of the three, mostly because it is an updated version of the original Star Adventurer. We believe you can find a basic Star Adventurer Pro (1st gen) for much cheaper and it'll do the job. We still use it to this day and we never have an issue with it. Try not to be tempted by the new versions if it doesn't work for your budget.

If you decide to go with the Star Adventurer, we suggest joining the Galactic Course! Season 2 contains a ton of information on capturing the Milky Way using a star tracker.
The image above was taken during the course with the Star Adventurer, so you should also be able to capture something like this once you've finished the lesson! And when you are ready to upgrade to a telescope setup, go through Season 1 to learn all about DSLR astrophotography (and other cameras) with a telescope.
DSLR Camera Accessories
Whether you plan to do wide-field astrophotography with your DSLR/Mirrorless camera and tripod or deep sky imaging with a telescope, consider getting one or two of the accessories below for your DSLR. Truthfully, if you can afford it, these accessories will make your life much easier in the long run and will save you a tremendous amount of frustration and time.
INTERVALOMETERS
This one is a no-brainer. If you were only going to add one accessory to your equipment, make it an intervalometer. This device will help you to take long exposures, add a delay, set intervals, and control exposure times. Some newer DSLR cameras may now have a built-in intervalometer, but they are often limited in what you can do.


Intervalometers can either be wired or wireless and are inexpensive. We have owned two wired intervalometers and although it can be a nuisance because it's dangling from our telescope, it has never failed us! Wired intervalometers also consume very little power, so you won't have to change your batteries for months.
The intervalometers shown here are examples of Canon and Nikon cameras. Be sure to order one that is fit for the model of DSLR camera you own!
Neewer Intervalometer for Canon (recent)
Fits Canon EOS 7D, 5D Series, 1D, 6D, 50D, 40D, 30D, 20D & 10D
Neewer Intervalometer for Canon (older)
Fits Canon 700D/T5i, 650D/T4i, 550D/T2i, 500D/T1i, 350D/XT, 400D/XTi, 1000D/XS, 450D/XSi, 60D, 100D, & Pentax
Aodelan Wireless Intervalometer for Canon
Fits Canon EOS M6 Mark II, 90D R, 80D, 77D, 70D, 60D, 800D, 200D, 7D Series, 5D Series, T7, T6i, T6s, & T5i
JJC Intervalometer for Nikon
Fits Nikon D750, D610, D600, D7200, D7500, D7100, D7000, D5600, D5500, D5300, D5200, D5100, D5000, D3300, D3200, D3100, Df Z7, Z6 & P1000
Pixel Wireless Intervalometer for Nikon
Fits Nikon D3100, D3200, D3300, D5000, D5100, D5200, D5300 D5500, D90, D7000, D7100, D7200, D600, D610 & D750
BATTERY GRIPS
We purchased a battery grip for our Canon 7D Mark II, and we can honestly say that we wish we got one sooner!


A battery grip gives you the option to use two batteries to power your DSLR camera. This means you will reduce the need to pause your exposure, turn off the camera, and replace the battery. That saves you a lot of time, especially when taking deep-sky images. When out in the desert, we typically spend 4 hours on our target, and if we were to use our DSLR camera with a battery grip, we would only have to switch the battery once instead of twice.
When we were first starting out, we couldn't begin to tell you how many times we lost our framing or focus because we had to turn off the camera and replace the battery. It was a constant worry. We would sit inside the car while the telescope was taking photos, but we would hop out every couple of minutes just to check if the camera was dead. If you feel like your battery capacity will give you a headache, consider getting a battery grip sooner than later. The two pictures above show a battery grip for Canon DSLR cameras (left) and a battery grip for Nikon DSLR cameras (right).
SD CARDs
We recommend having either two 32GB SD cards or one 64GB SD card for astrophotography.
Both SanDisk and Transcend are known for making excellent SD cards, although SanDisk is often more expensive than their competitor.


We use the Transcend 64GB card seen above for imaging, and it has always been perfect for us. We still have plenty of space on the card when packing up and have never had a problem with it. On the other hand, many amateur astrophotographers recommend having two smaller cards rather than one large one. Sure, you might have to switch them out during the night if one gets full, but at least you will be able to keep half your data if one fails and becomes unusable.
32GB:
SanDisk Extreme Pro 32GB - $52.99
Transcend Class 3 V90 32GB - $31.49
64GB:
SanDisk Extreme Pro 64GB - $91.99
Transcend Class 3 V90 64GB - $56.99
Whichever SD card you choose, make sure it is fast, meaning it can write the data in its memory quickly and start copying the next image. A fast SD card will ensure that your camera does not slow down while imaging, and you are also less likely to get error messages which could stop your exposures.
At this point, you should have everything you need for beginner DSLR astrophotography. However, it might be helpful to read about a serious beginner Astrophotography setup to discover if this option is more of your pace and sustainable for the long term. In the next section, you'll find information about telescopes, mounts, and the needed accessories!
Beginner Astrophotography Telescopes
Choosing your first telescope can be a long and stressful process. We remember that feeling as if it were yesterday. It took weeks of scouring sources, reading articles, watching videos, and even asking other astrophotographers for advice on what telescope to buy for deep-sky imaging.
When you are first starting out, buying the wrong telescope can be a "hobby-killer." What if it's too difficult to use? What if the image you get is not what you expected? What if you find it too large or too heavy in the long term? All of these questions should be addressed before spending money on what will become your new primary "lens."
Below we discuss the two types of telescopes for astrophotography: Reflectors and Refractors. There are other types of instruments, but we thought it best to leave those out of this post as they aren't optimal for beginners. Keep in mind the telescopes listed below have been chosen with astrophotography in mind, not visual. If observing planets and deep-sky objects is your preferred activity, we recommend purchasing a Dobsonian telescope.
Read our article about the best telescopes to start astrophotography.
1 - NEWTONIAN REFLECTORS for Astrophotography
A Newtonian reflector telescope is made with two mirrors. The light enters the tube and hits the large primary mirror in the back of the telescope, then gets reflected onto the secondary mirror which is picked up by your camera sensor.
Fast reflector telescopes, often called astrographs, have a major setback compared to refractors: they need to be collimated often. If you own one of these, expect to collimate the mirrors before every imaging session. Although it might sound scary for beginners, this is how we started and we managed to make it out - and so can you! Collimating is very easy nowadays thanks to collimation accessories like laser collimators. You can read our tutorial and watch our video to see how we collimate our telescope with a laser in under 90 seconds.
As you may have guessed, our first telescope was a Newtonian reflector. We went with an 8" Newtonian for its fast focal ratio, its price, and its popularity. We made a full review video and written post about this telescope, check them out!

Its aperture of 8" and focal length of 803mm means that we can frame all Messier objects and many other DSO's perfectly in our camera's live view without cutting anything off. If you plan on purchasing a telescope like the Orion Astrograph as your first imaging telescope, you may be tempted to "upgrade" your cart with the 10" version instead. We almost did, but we're glad we stuck with the 8" tube and checked out. At the beginning of your deep-sky astrophotography with a telescope journey, you most likely will start by capturing the "Easy-3" deep-sky objects: M31, M42, and M45.
If you were to get the 10" or larger version of this telescope, you may lose part of the arms of the Andromeda galaxy, the outer gas of the Orion Nebula, and a few big stars from the Pleiades from your frame. This is because their respective focal length is higher as the aperture goes up (for example, the 10" one has a 1000mm focal length). That's why we suggest going up to 8" but not over if you decide to get this as your first telescope. You can capture great images when you hunt for small objects!
If you watched or read our review, we recommend the Orion 8" Astrograph f/3.9 for a beginner astrophotographer who's leaning towards a reflector as their first telescope!
Telescope Specifications
Manufacturer: Orion
Aperture: 8" (203mm)
Focal Length: 800mm
Focal Ratio: f/3.9
Tube weight: 17.5lbs
Tube length: 762mm
2 - REFRACTOR TelescopeS for Astrophotography
Refractor telescopes are excellent beginner telescopes. They are easy to use and low maintenance, however, they often are pricier than reflectors. Think of a refractor tube like a big camera lens, where light enters from one end, passes through the objective lens, and ends up on your camera sensor.
Unlike the Astrograph Newtonian reflector we talked about, refractor telescopes do not need to be collimated before imaging!
If you decide to get a refractor telescope, look for the term "ED" and "APO" in their description. APO stands for Apochromatic, meaning the instrument was built to reduce chromatic aberration. "ED" stands for Extra-Low Dispersion and works hand in hand with APO scopes. This just defines the type of optical glass used. This combats false color in your images, which would otherwise sometimes make your stars purple instead of white, blue, or red.
For your first refractor telescope, we recommend getting a small, portable, and lightweight Apochromatic refractor. Here are our top three for beginner astrophotographers, in no particular order:


1) EXPLORE SCIENTIFIC 80MM FCD100 F/6 ED APO TRIPLET REFRACTOR TELESCOPE
Explore Scientific is known for making superb wide-field astrophotography telescopes. The Explore Scientific 80mm f/6 ED APO Triplet refractor is one of the company's most popular telescopes. It is light, small, and has a relatively fast focal ratio of f/6. The Explore Scientific 80mm ED APO Triplet will give you crisp images of some of the largest objects in the night sky.

Telescope Specifications
Manufacturer: Explore Scientific
Aperture: 3.25" (80mm)
Focal Length: 480mm
Focal Ratio: f/6
Tube weight: 7.5lbs
Tube length: 381mm
2) Apertura 90mm Triplet Refractor
The Apertura 90mm triplet telescope is a very nice triplet refractor telescope that comes with the field flattener included in the box. The focal length of 540 can fit most objects in the night sky and can be okay for some small objects as well.
Telescope Specifications
Manufacturer: Apertura
Aperture: 3.54" (90mm)
Focal Length: 540mm
Focal Ratio: f/6
Tube weight: 9.8lbs
3) ASKAR FRA500 F/5.6 PETZVAL REFRACTING TELESCOPE
The Askar FRA500 is the telescope we are currently using in our backyard setup.
This telescope has a focal length of 500mm, but if you'd like, you can pair it with the Askar 0.7x reducer/flattener to make its focal length 350mm instead. This will also make it faster, going from f/5.6 to f/3.9! In most cases, you can enhance the speed of your f/ number with additional gadgets to your telescope like a reducer/flattener.
If you don't mind the native focal ratio and want to keep things simple by not bothering with a field flattener/reducer, you can instead purchase a different version of this telescope with your desired focal length. In fact, Askar made a few variations of this telescope: the FRA 300, FRA 400, FRA 500, and FRA 600.

Telescope Specifications
Manufacturer: Askar
Aperture: 3.5" (90mm)
Focal Length: 500mm or 350mm with reducer
Focal Ratio: f/5.6
Tube weight: 9lbs
Tube length: 407mm
Want to learn all aspects of astrophotography in the most efficient way possible?
The Galactic Course includes a membership that gives you unlimited access to all our astrophotography courses. Step into an ever-growing realm of knowledge and learn at your own pace. Make life-long friends and connections with other members, and get tips from instructors that truly care about your journey and progress under the night sky.
Motorized Equatorial Mounts
If you've been searching the web for astrophotography equipment, you have probably come across sources noting that a mount is the most important piece of equipment when it comes to astrophotography with a telescope. And, it's true.
Here is what you need to look for when purchasing a mount for deep sky imaging:
It needs to be a German Equatorial Mount or Strain Wave Gear Mount.
It needs to be motorized.
It needs to have a GoTo capability.
It needs to have a large payload capacity.
Below are the four mounts we recommend for long-term astrophotography. We do not recommend buying a cheap mount. You will regret your purchase if you decide to pursue this hobby, and may be forced to spend more money to upgrade later.


1) ZWO AM5
Our favorite mount for backyard imaging and traveling! The ZWO AM5 is a strain wave gear mount, meaning you don't need to balance the axis or even use counterweights - as you would with most telescopes.
On top of that, the mount is small, light, and super portable. Be sure to read our full review about the ZWO AM5.
Manufacturer: ZWO
Database: None in the hand controller but unlimited using the ASIAIr or laptop
Payload Capacity: 28.6 pounds
Mount head weight: 11 pounds
Comes with a tripod: Available as an add-on
2) Sky-Watcher EQ6-R
The Sky-Watcher EQ6-R is a mount we have been using since we started. It has 42,900 deep sky objects in its database and is extremely reliable. It can also hold 4 extra pounds which is nice considering the small price difference with the Atlas EQ-G. Sky-Watcher mounts are some of the most popular motorized mounts in Astrophotography and should last for years!
Manufacturer: Sky-Watcher
Database: 42,900 objects
Payload Capacity: 44 pounds
Mount head weight: 38 pounds
Comes with a tripod: Yes
3) Celestron CGX
Orion's main competitor, Celestron, makes great mounts as well. The Celestron CGX mount has the biggest payload capacity of the three listed so far, all while still being affordable for a wide range of users. However, the mount is also the heaviest of the three, which might be bothersome if you image far from home.
Manufacturer: Celestron
Database: 40,000 objects
Payload Capacity: 55 pounds
Mount head weight: 44 pounds
Comes with a tripod: Yes
4) Software Bisque Paramount MYT Robotic Mount
We were hesitant about including this mount in our list, but for the folks who have some cash to splurge, you can get a Software Bisque mount! These mounts are expensive but are extremely well-designed and could possibly last a lifetime. We had issues with the Paramount MyT mount we used for a year, and decided not to use them anymore. However, Software Bisque mounts are in our opinion excellent when permanently installed in an observatory.
It has the best weight-to-payload capacity out of all the German Equatorial mounts on this list, by far, and can even hold 50 pounds without counterweights!
Manufacturer: Software Bisque
Database: Unlimited
Payload Capacity: 100 pounds
Mount head weight: 35 pounds
Comes with a tripod: No
Power Supply for Astrophotography
You now have your astrophotography mount and are ready to go image!
With that said, you will need a power source to turn on the mount and tell it to track the stars!
There are three options below, the "easy but unreliable option" which is what we started with but will not last, the "annoying but safe option" which should last many years but is heavy and needs special accessories, and lastly, the "simple but expensive" option which is what we currently use.
Do yourself a favor and get the third option. Seriously. We promise it's not worth reading about the other two unless your budget is extremely limited and you want to start right away.


1) Stanley Power Station Jump Starter: The Easy but Unreliable Option
The Stanley Power Station Jump Starter is what we started with due to budget restrictions, and while it "worked" it only lasted us a little over a year before losing its power potency.
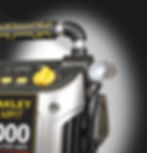
Why is it Easy?
A Jump Starter is very easy to use and comes with USB ports and its a cigarette lighter port. That means you can charge your phone or tablet with it, and you can also directly plug your mount's cigarette lighter cable straight into it.
It is also nice to have when imaging far from home because it can fill up air in your tires and, obviously, you can jump-start your car in emergency situations.
It also has its own light which is useful when packing up late at night.
Why is it Unreliable?
It is a reliable option until it's not. The thing is, it's not built for what we used it so it was bound to lose its potency at some point. In our experience, this power source lasted 4 hours in a row without a problem before it stopped. The power was strong and consistent, so we were very happy with it. We were very eager about imaging at the start of our journey, so we didn't mind!
However, it gave up after a year without indication. Without a sign or alert, the power source would random flicker on and off which impacted our imaging session, and a few days later it completely shut off. We were devastated when it happened because it happened after we drove an hour away and set up everything. We were in a good mood until we realized our power source decided to stab us in the back. Et tu, jump starter?
Overall, we liked having this battery with us on the field. We didn't have to worry about any extra cables or clamps during our beginner phase. We'd certainly do it differently if we started now.
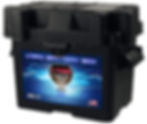
2) Deep Cycle Battery: The Annoying but Safe Option
After the death of our jump starter, we purchased a Deep Cycle Battery which leveled up our imaging capabitlities, but also gave us the power we needed for new accessories.
If, like us, you are not familiar with electricity and batteries in general, a deep-cycle battery can be a scary purchase. The thing looks like a brick, there are no USB or cigarette lighter plugs, there isn't a tiny light or even a decent handle to conveniently carry it around… Why would you need this, let alone wan it for your setup? Well, mainly because this "brick" is powerful.
Why is it annoying?
As we mentioned, there's no single-hand way to carry this battery, so you will need to carry it around with both hands by the small handles on its sides.
This can be a real challenge when you have to move it around. Unless you're a strong acrobat and can close the trunk with your teeth, use both hands to carry it and do so with caution.
Here's the annoying part - you will need to purchase an extra cable to use it. It does not come with a cigarette lighter port or any accessories for that matter. You will need to buy a cigarette lighter to clamps adapter. With this cable, you can attach the clamps to the battery, and plug in the cigarette lighter end to your mount's port to connect the power and turn it on.
Yes, you could play with electrical wires and build your own case to have plugs directly on the battery case, but as we said, we assume you are not familiar with working on batteries. It could be life-threatening to do a DIY, so know the risk before jumping into it.
Why is it safe?
Once plugged in, the battery will last you many, many hours before dying. You can't image deep-sky objects after sunrise, but if you could, this battery would allow you to continue. Deep Cycle batteries are known to last years, as long as you charge them properly and do not leave them without a charge for too long. If you take a break from Astrophotography, ensure the battery does not just sit in the garage cold and alone for months, or it will affect its life expectancy.
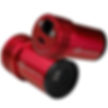
3) Portable Lithium Battery: The Expensive and Simple Option
Lithium batteries are by far the best way to go, and despite being the most expensive option, it is what we recommend to beginners.

Lithium batteries are incredibly light, and last for a long time! This battery is very easy to carry around, doesn't weigh much, and is such a life-changing upgrade from the deep cycle battery. Trust us, you won't regret going right for this option.
Most lithium batteries like this have a handle for convenient carrying, an integrated flashlight, and of course, a variety of ports!
We haven't had issues so far with this battery, even while spending an entire night imaging.
We recommend going with the excellent Apertura Power Supply or something like the Jackery battery (the 500 or 1000 version). We reviewed a Jackery battery in the past which you can see below.
T-Rings, Coma Correctors, Field Flatteners & T-Mount Adapters
How do you attach a DSLR camera to a telescope?
Well, you may need a few parts to successfully connect your camera firmly onto your telescope.
By now, you have a short list of all the large pieces of gear you need for Astrophotography. But don't forget about the small pieces required for the rest to work. First, let's talk about how to connect your DSLR camera to your telescope.
T-RINGs


No matter what type of telescope you own, you will need a T-Ring. Attaching this to your camera will allow you to screw in a second adapter that will go directly into the telescope's focuser.
The type of T-Ring you buy should not matter, but you should get a strong one and, of course, one that works with your camera's brand. On the left is a T-Ring for Canon cameras, and on the right is a T-Ring for Nikon cameras, both made by Orion.
Coma Correctors
If you chose the super-fast f/3.9 Newtonian reflector for your first telescope, you're going to need a coma corrector.

Fast Newtonian telescopes (usually f/6 or faster) are great for capturing deep sky objects in less total exposure time than other telescopes but they suffer from coma aberrations. A simple way to fix this is to attach a coma corrector between your camera sensor and telescope.
These are usually expensive, but trust us, you will eventually get frustrated with your images by not taking care of the coma right from the beginning. See our post on Messier 27 to see exactly what we're talking about.
If you did not choose a telescope of f/6 or faster, then you may not need a coma corrector, but you may need a field flattener.
Field Flattener


A field flattener is mostly necessary for refractor telescopes with a short focal length. This helps correct the field curvature that becomes apparent in these types of telescopes and gives the stars on the edges sharpness and a more realistic look. Above is an Orion field flattener, as an example.
T-Mount Adapter
If you own a Newtonian reflector telescope that is slower than f/6, or a refractor telescope that has a focal length of 800mm or more, you might not need a coma corrector or a field flattener!
You can purchase a T-Mount adapter instead, which will allow you to connect your camera to your telescope just like the other two, but it doesn't have an effect on your images.
You may also get a T-Mount adapter if you do not have the funds (yet) for a coma corrector or field flattener. You will need at least one of these small pieces of equipment to attach your camera to the telescope.
Auto-Guiding
Auto-guiding is crucial for telescopes with a focal length of 800mm or more, but less important for smaller instruments. We recommend a guiding camera for any kind of setup anyway. It will make your stars more crisp, make you feel safer, and teach you how auto-guiding software works.
We decided to get this ZWO ASI 290MM Mini camera as our main guiding camera after we got the ASIAir. This product does not come with a guide scope, so be sure to also get a 30 or 50mm guide scope with it.
Accessories to Make your Life Easier
Achieving the perfect focus

Focusing on a bright star is not difficult, but you want to make sure that your focus is absolutely perfect before launching any exposures for the night. How can you find out if you have perfect focus? A Bahtinov mask - it is a cheap, lightweight, small, and very reliable. Just make sure you get the right size for your telescope!
If you're unsure how to use it, you can read our tutorial post or watch our video about How to Focus using a Bahtinov mask.
Collimating in seconds

If your telescope is a Newtonian reflector, save yourself the trouble and buy a laser collimator. Just like we showed you in our How To Collimate in 90 seconds tutorial post and video, this little gadget will allow you to collimate your mirrors in seconds. This is the one we use and we love it!
Getting the perfect polar alignment

We believe in learning how to polar align the old-fashioned way if you want a true astrophotographer's experience. Even if you can afford a polar aligning tool, try it the manual way first before committing to one. It might take a little effort to learn but your passion will drive you. And, once you know how to do it you'll keep that knowledge forever.
However, we admit that overcoming the learning curve keeps interested individuals in the hobby longer, so we recommend the QHY Polemaster; an accessory that attaches to your mount's polar scope and connects to your laptop. It will help make your polar alignment perfect prior to imaging.
Know that you don't need this if you use the ASIAir or Sharcap.
Light Pollution Filters
Depending on where you live or how far you are willing to travel to find the darkest night sky possible, you may or may not consider buying a filter to combat light pollution.

Two of the best duoband filters for light pollution are the Optolong L-Ultimate, and the Askar Colour Magic.
CLS filters (city light suppression filters) are great for people who do not have the luxury of driving out of town to find dark skies. If imaging in broadband, you can use a filter like the Optolong L-Pro. We never use broadband light pollution filters because we prefer to escape the city lights and image for the best quality possible.
Individual Narrowband Filters


If you feel you are past the beginner DSLR astrophotography phase and would like to capture very faint deep space gas, consider buying a narrowband filter.
As you may have seen in Episode 8 of Galactic Hunter, we purchased a Hydrogen Alpha DSLR Clip-on filter (left) for our Canon 7D Mark II for the sole purpose of getting a better image of Barnard's Loop. It was a little tricky for us at first, but we were able to capture some really faint detail which you can see in our comparison shots on our Barnard's Loop post.
The other two types of Narrowband filters are Sulfur II (middle) and Oxygen III (right).

Want to learn all aspects of astrophotography in the most efficient way possible?
The Galactic Course includes a membership that gives you unlimited access to all our astrophotography courses. Step into an ever-growing realm of knowledge and learn at your own pace. Make life-long friends and connections with other members, and get tips from instructors that truly care about your journey and progress under the night sky.
Useful Software for Astrophotography
Software for your Imaging session
Planning ahead is an essential part of Astrophotography, especially if you do not image from home. Being prepared is the biggest leg up you can give yourself - after all, there's only so many hours in the evening. In the past you had to look at physical maps of the sky to try to coordinate your readings with the day and time you'll be imaging. Now, we have powerful software that can give you information on millions of targets. The best part is that a lot of software programs are free!


We personally use three different software programs to plan out our night. Stellarium, SkySafari Pro, and the mobile app Star Chart.
Stellarium and SkySafari Pro are both software for computers. They can be used to simulate how the sky moves depending on your location, get info on tons of deep-sky objects and planets, and you can even check the framing of your camera! Stellarium is free and easy to use. We usually launch Stellarium when we have to check something really fast before going home.
The pro version of SkySafari is not free, although they often have coupons for as much as 50% off on their website. It has a bigger catalog than Stellarium and has more features.
We decided to purchase SkySafari Pro after 3 years, even though we were happy with Stellarium. We bought it mostly so we could connect it to our ASIAir (not part of this list of equipment of beginners) and to slew our telescope anywhere using our mobile device. Stellarium may also be able to do that as well with recent updates.
Star Chart is a free mobile app that you can use to find popular deep-sky objects, planets, and stars by pointing your smartphone up and around. It is nice when you want to do a Star Alignment but aren't sure where a specific star is in the sky and want to anticipate which direction your mount will slew your telescope.
For a beginner, we suggest sticking with free software and apps and recommend Stellarium for the computer and Star Chart for mobile devices.
Software for Guiding

The most popular guiding software for Astrophotography is by far PHD2.
PHD2 is so easy to use that its name literally stands for "Push Here Dummy", as one only needs to press a button to begin guiding (well, yes and no).
PHD2 usually works very well but we did have problems with it a few times. You might have to mess around with the settings but you should expect it to work with default settings.
Software for Image Processing


1) Deep Sky Stacker
Deep Sky Stacker, or "DSS", is a stacking and processing software for Windows computers. This is the processing software we started with and it is how we learned the power of stacking. It is easy to use, user-friendly, and most importantly, free!
The processing part of Deep Sky Stacker does lack features, which is why we switched to the next processing software on this list only after a couple of weeks…
2) PixInsight
PixInsight, unlike Deep Sky Stacker, works on any computer, but it is not free. The software costs 300 euros (about $330), and is likely to become more expensive in the future. PixInsight is, without any doubt, the best Deep Sky processing software accessible to amateur astrophotographers. The possibilities are endless and so is the learning curve. PixInsight has one of the most difficult learning curves we have ever seen in any software, so you will never stop learning.
The price might make you hesitate, but trust us, if you are serious about Astrophotography and are willing to spend enough time learning how the software works, this will be one of the best investments you will make in this hobby. We made a 3-part video tutorial on how to stack and process a nebula from start to finish here.
3) Adobe Lightroom
Lightroom will not stack or process your deep-sky images, but is a great tool to enhance the image after it comes out of whichever processing software you used. This will allow you to do simple things like reduce the noise, sharpen, or saturate in a quick and easy way. You might not need this if you have done everything perfectly during processing, but we usually like to give it a go before being entirely done with our images just in case.
Alternatives for Astrophotography Without Equipment
Did you find this list of all you need for Astrophotography equipment a bit… long and expensive? Maybe you scrolled all the way to the bottom? Well, good for you because we decided to add a side note for those of you who might not want to purchase a lot of gear now, but still want to get some pictures of the stars. Below are four alternatives that do not require a lot of equipment and can yield great results!


Astrophotography using Binoculars

As we have mentioned before, we started our Astrophotography journey with a pair of binoculars and an old Point & Shoot camera. Do not expect to capture galaxies or nebulae this way, especially because Point & Shoot cameras usually do not have a way to change the exposure time. But with a little patience and tenacity, you should be able to get an image of a planet and its moons (like Jupiter or Saturn), a double star system (like Albireo) and our moon!
You can also use your smartphone instead of a Point & Shoot camera, which will probably give you better results anyway.
Astrophotography using a smartphone
With the rise of Astrophotography, smartphone companies have been working really hard the past couple of years to make their smartphone cameras more sensitive to light and even allow long exposure shots to be taken. For example, the iPhone 11 Pro now has a low-light camera. Even better, Google advertises that its Google Pixel 4 can take great photos of the Milky Way in just a few seconds!


If you have the telescope but do not own a great camera, you can instead purchase a smartphone adapter and use your phone as a camera, for now.
The results will not be 10/10, but you should be able to image some of the brightest objects in the night sky!
We recommend getting the Celestron Nexyz 3-Axis Universal Smartphone Adapter as it can connect to any telescope, binoculars or even a microscope, which you might find useful in the long run!
Astrophotography with a DSLR camera and a tripod only
You can get beautiful images of the Milky Way, the moon, planets, even galaxies, and nebulae just by using a cheap DSLR camera and a tripod. We made a video where we show you our results for several deep sky objects using our old Canon t3i and a tripod, no tracking needed!
Astrophotography using a Smart Telescope

Although expensive, this option technically does not require you to purchase several pieces of equipment or have a fully functional Astrophotography rig. It's an all-in-one option.
We have tested the Stellina Observation Station many times, and are happy to report that it is impressive. You simply take it out of the bag, set it down, and start shooting with your mobile device. No polar alignment, star alignment, collimation, or focusing needed!
You can watch our Unboxing video and read our full review about this product if you are interested.
Final Thoughts
And this concludes our post about beginner DSLR astrophotography equipment! Let us know in the comments below if there is anything you'd like us to add to the list, or if you have any questions!
We also have a similar but shorter post about Advanced Astrophotography gear, where we talk about cooled astrophotography cameras, filter wheels, and some advanced accessories.
We wish you the very best on your Astrophotography journey! There are times when you will want to give up or feel like you are not good enough for this hobby, but keep going! We almost gave up many times, but always learned from our mistakes and are happy we pushed through. Always try to teach yourself how to become better and the next thing you know, your images will be featured on magazines and astronomy websites. When that happens, please let us know!
You can also read our full guide about how to start astrophotography by clicking on the image below! Also, make sure to check out the Galactic Course for access to lessons about all aspects of Astrophotography!

Clear Skies,
Antoine & Dalia Grelin
Galactic Hunter
GALACTIC HUNTER BOOKS


