
Beginner Astrophotography: A Complete Guide
- Antoine & Dalia Grelin

- Nov 18, 2020
- 35 min read
Updated: Jul 21, 2025
In this guide, we will go over everything you need to know about starting astrophotography. It is our hope that this post will take away some of the fears you may have when you think about both the difficult aspect of this hobby and the costs associated to it. Trust us, you can get wonderful images with very basic equipment and with very little training. Let's get started!

Table of contents:
A full Beginner Astrophotography setup
Wide Field vs close up Astrophotography
Astrophotography with just a DSLR camera and a tripod
Astrophotography with a DSLR camera, tripod and star tracker
Astrophotography with a DSLR camera and a telescope
Using a modified camera for Astrophotography
How we got started
Our very first image of the night sky
Tips for your first image of the night sky
The Bortle Scale: Understanding and escaping light pollution
Our very first astrophotography rig
Equipment upgrades over time
How to connect your DSLR camera to a telescope?
How to use the intervalometer
How to choose your first telescope?
Small vs large telescopes: Is bigger always better?
The mount: How tracking works
The importance of balancing your equipment
How to polar align?
Cable management
Stacking: What is it and why bother?
Taking Calibration frames
Processing Astrophotography data
Other types of Astrophotography
Conclusion
Want to learn all aspects of astrophotography in the most efficient way possible?

The Galactic Course includes access to all our astrophotography courses and processing guides. Step into an ever-growing realm of knowledge and learn at your own pace. Make life-long friends and connections with other members, and get tips from instructors that truly care about your journey and progress under the night sky.
A full Beginner Astrophotography setup
What does a full Astrophotography setup look like? We will go over a more advanced astrophotography rig later in this guide, but for now, what are the absolute crucial parts that make up a complete setup? It is important to know that just having a telescope doesn't mean you can do Astrophotography. If you do not have the funds to purchase a complete rig, it is actually better to start imaging the night sky wide field with just a DSLR camera, lens, and tripod. We'll also go over this later.

A typical Astrophotography setup is composed of:
A motorized mount (German Equatorial or Strain Wave Gear)
The one we are using in the image above is the ZWO AM5 which is a strain-wave gear mount and is, in our opinion, the best beginner mounts as of today. The EQ6-R Pro is a GEM mount and is also a good reliable mount. It used to be the very best until the arrival of the AM5. Know that astrophotography mounts are usually more expensive than the actual telescope, which might come as a surprise to you! The mount is extremely important as it will ensure your stars look round and crisp. A low-quality mount will be more likely to have tracking issues and result in blurry images.
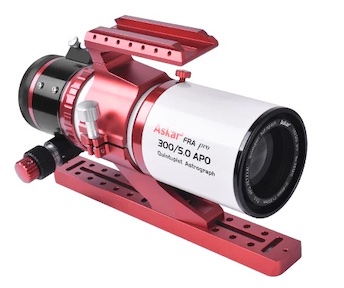
A Telescope
First of all, you do not need a telescope to do astrophotography! For a full deep-sky rig that includes a telescope, most beginners tend to purchase a small refractor telescope like the one seen in the image above. Some others, like us, decided to go the reflector way which we'll talk about later as well. Refractors are usually easier to use but are also more expensive. An example of a great beginner refractor telescope is the small Askar FRA300 or the Apertura 75.
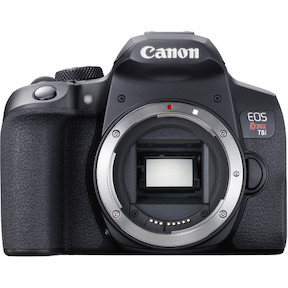
A Camera
The camera is the third main part of the setup. Since you can't take photos with your eyes (yet, come on Elon!), you'll need to attach a camera to your telescope to capture the beauty of the night sky. You can do so easily with a "T-Ring", which is a very affordable, small piece that replaces the lens connection. There are four main types of cameras: DSLR/Mirrorless cameras, uncooled astrophotography cameras (usually for guiding or planetary), cooled One-Shot-Color cameras, and cooled monochrome cameras.
An Intervalometer (or laptop)
An intervalometer allows you to control your DSLR camera's exposure times and the number of shots you would like it to take. This is a small accessory that you connect to the side of the camera and just leave hanging all night while your camera is imaging. Alternatively, you can instead use a laptop with a DSLR acquisition software like BackyardEOS if you do not want to bother with an intervalometer. We personally feel like using an intervalometer is easier.
The Auto-guiding Solution
Unless your main camera has a built-in guide sensor, you will need a "guide scope" with a dedicated guide camera attached to it. Motorized mounts can track the sky pretty well, but their accuracy depends on how good your polar alignment is. A guiding solution (guide scope + guide camera) connected to a computer running a specific software will lock on one specific star and analyze its movement every couple of seconds. It will then send very fine corrections to the mount every few seconds to remind it to stay on track!
A Battery
If you plan to image from your backyard, then you don't need to bother with a portable battery! If, like us, you start this hobby without having a backyard and have no choice but to travel every time you want to image, then you need to invest in either a deep cycle battery or even better, a much lighter Lithium battery. These will connect to your equipment and power it all night long!
Those were the main parts that compose a full astrophotography rig. You will see later in this post that this list can easily double in size when you get more and more advanced in the hobby. One of the running jokes about astrophotography is that once you start, you can never stop spending money on new equipment!
Wide Field vs Close Up Astrophotography
Astrophotography can be done in several different ways. You can image the Orion Nebula with a telescope (left) and get a nice close-up view of this object, or with just a camera lens (right) and capture the entire nebulous region around the object.
The size of the telescope (or lens) you use is important because different sizes will give you different fields of view. You only have a large telescope and the Orion Nebula does not fit entirely in your frame? No problem, you can focus your attention on the Trapezium cluster in the core of M42!
Down the line, it is great to own two telescopes, a small one with a wide field of view, and a larger instrument for close-up shots of the universe.
The Orion Nebula, with and without a telescope. Can you spot it on the image on the right?


Astrophotography with just a DSLR camera and tripod
As I mentioned earlier, you do not need a telescope or an expensive rig to do astrophotography. The best way to start astrophotography is by using what you already have! We started with an old and cheap Canon Powershoot point-and-shoot camera to take our first images of the night sky, as well as the moon.

Join our FREE online course about untracked deep sky astrophotography! Learn how to capture galaxies and nebulae with just a tripod, camera, and lens.
Get access for life and go through lessons that will teach you planning, equipment, imaging, processing, and more.
For good results, you will definitely need to get yourself a DSLR camera though. DSLR cameras will allow you to switch lenses, control your exposure time, and save your images in "RAW" format so that you can process them later and really bring out the faint data that you captured. We personally are fans of Canon cameras and haven't used other brands to do Astrophotography.
Here are three great DSLRs you can buy, depending on your budget:
Canon T3i: Around $200 on eBay.
Canon T8i: $699, can find it for $400 or less on eBay
Canon EOS Ra: $2,499, the absolute best for Astrophotography with a DSLR camera. It is built to allow Hydrogen Alpha gas to reach the sensor, but know that lenses can be more pricy for this camera. Sadly, it has been discontinued.


Besides the camera, the only other things you will need are a sturdy tripod, a good lens, and an intervalometer.
For the tripod, our favorite is a Carbon Fiber Tripod. It is incredibly light and is also very sturdy. The intervalometer depends on the camera you purchased, but the one we use is affordable and comes with two types of plugs that should fit almost all Canon cameras.
As for the lens, well, that depends on what you plan to image. We think of three categories when we think of camera lenses: wide, narrow, and telephoto.
A wide lens, like the Rokinon 10mm will allow you to capture the entire Milky Way galaxy (see left image), perfect for time-lapses or cool landscape shots! A narrow lens like the "Nifty Fifty" 50mm f/1.8 from Canon is great for close-up shots of the Milky Way core (see right image), or wide views of deep-sky objects. A telephoto lens will really zoom in all the way on your object and is honestly not great if you don't have a tracker, but you can still get interesting images of planets with their moons for example!


What targets should you image if you don't have a star tracker? Without a star tracker, you are very limited to what you can image, although it is not impossible to get great images of fainter objects if your lens is fast!

The Andromeda Galaxy is the easiest galaxy to photograph. It is very large, bright, and looks impressive!
This object is best captured with a lens that is between 50mm and 300mm of focal length. On the left is our image of M31 untracked using our 135mm lens. It is best photographed in Fall.

Another target you can attempt is the famous Orion Nebula. This is also a large and bright object that is very easy to photograph. Make sure to watch the video below, where we explain how to photograph deep-sky objects with just a camera, lens, and tripod, and show you lots of images taken with this equipment!
The image on the right was taken with our 300mm telephoto lens.
What you need to remember when doing untracked astrophotography is your maximum exposure time without getting star trails. With no tracker, your camera stays still and does not "follow" the stars. This means you cannot take long exposures especially if using a medium to long focal length lens.
The most basic way to calculate your longest possible exposure before getting apparent star trails is by doing the following math:
500/focal length of the lens = maximum exposure time If you are using a 50mm lens, you would do: 500/50mm = 10 seconds. An easy way to remember this equation is by calling it "The 500 rule". A variant, the "600 rule" is also popular, but we prefer using 500 over 600.
Astrophotography with a DSLR camera, tripod, and tracker
Imaging with just a camera and tripod is great and will help you get familiar with the night sky and get yourself accustomed to this hobby. But what will greatly improve your results and take you to the next level is using a star tracker.
Star trackers are much less expensive than German equatorial mounts, but that doesn't mean they can't do the job! They are also much smaller and portable.
There are two star trackers that dominate the market, the Sky-Watcher Star Adventurer Pro and the iOptron Sky Guider Pro. Both have a similar size, payload capacity, and cost. Their main difference is their color :)


With a Star Tracker, you will be able to take much longer exposures, no matter the size of your lens! It will also teach you about a crucial aspect of astrophotography: polar alignment.
A good polar alignment (meaning the tracker/mount points exactly at Polaris, the North star) will allow you to track the stars for a long period of time before experiencing star trailing. With star trackers, the one thing that will affect how long you can track the stars (besides a great polar alignment) is the weight of your instrument. A heavy camera, with a heavy lens attached, will have a significant effect on what maximum exposure time you can do. Some star trackers have a port where you can plug in a guide camera and guide using PHD2. This will definitely help if you intend to use a huge lens on a tracker.
Usually, we don't bother with guiding when using our star tracker, and we can still achieve 3 to 5-minute exposures without trailing with our Canon 7D Mark II and 50mm lens.

Astrophotography with a DSLR camera and a telescope
This is how you can really get close-up images of your favorite deep-space objects. Imaging the night sky with a telescope has a much steeper learning curve than imaging with a camera and lens only.

Now, several pieces of equipment have to work together in order to produce great results, and there is also much less room for mistakes. Your tracking/guiding will have to be accurate, or star trailing will become much more apparent due to the higher focal length. You will also need to ensure the back-focus between your camera and the instrument is perfect if you do not want elongated stars on the edges of your images.
This might sound scary, but imagine learning this 10 years ago when there were zero tutorial videos on YouTube! Today, the internet is filled with instructive websites that will teach you everything about astrophotography from beginning to end. If you feel ready to start imaging with a telescope, take the time to learn and do not be afraid to make mistakes on the field. The more you practice, the faster you'll learn.
Using a modified camera for Astrophotography
Is it worth it to modify a camera for astrophotography?
This is a question that often comes up from beginner astrophotographers who wonder if they can get more out of their current DSLR or mirrorless cameras.
Astro-modded cameras, whether they are DSLRs or mirrorless, are much better than unmodified cameras when imaging most deep-sky objects, and are really excellent at getting stronger signal from emission nebulae. This is because modded cameras are much more sensitive in several wavelengths but especially in the hydrogen-alpha wavelength.

Above is a picture of Barnard's Loop showing a comparison shot between an unmodified DSLR camera (left) and a modified mirrorless camera (right). The stock version is 3.6 hours of total exposure time, while the modified camera image is only 1 hour!
The cost of upgrading to a dedicated astronomy camera is often greater than the cost of modifying a DSLR camera. The main advantage of astronomy-dedicated cameras is that they are cooled, which will give you much less noise, especially during hot summer nights. But we cannot hide the fact that astro-modded cameras also do an excellent job at capturing fantastic images of deep-sky objects. The main advantage astro-modified cameras have over astronomy-dedicated cameras is their ease of use. Unlike astronomy cameras, modded DSLR/mirrorless cameras retain their LCD display, playback feature, and actual buttons.
So the question you need to ask yourself is: "Am I ready to sacrifice the ease of use of my current camera in order to get a cooled astronomy camera?". If the answer is "no" and you want to keep astrophotography as simple as possible for the next year or more, then consider getting your camera modified instead of purchasing a cooled camera.

The company we suggest using, if you decide to get a modded camera, is Astrogear. We have tried a camera from them and were blown away!
You can either ship your current mirrorless or DSLR camera to them for the astro-conversion service, or you can purchase a pre-modded camera.
Be sure to read our full guide about astro-modified cameras which also includes a video for you to watch. You will learn much more about using modified cameras for astrophotography.
How we got Started
We have a full in-depth post about our entire "Astrophotography story" that talks about how we got started and everything major that has happened for us over the years. But let's quickly summarize how we got started in this post anyway! In 2015, we realized that a short drive out of Las Vegas allowed us to escape most of the light pollution. We took a drive out of the city and observed the stars together from a Bortle 4 zone. It was a fantastic night.

After that, we decided to buy a pair of binoculars, the Orion 20x80 Astronomy binoculars and decided to try imaging the stars through this instrument with our old Point and Shoot camera.
This did not work well, as you can see on our first image of the Pleiades… Yep, it's pretty terrible, but it's there! It was great to observe the stars, clusters, and even galaxies through these, but not to do astrophotography.
We then attempted to take a picture of the moon through the binoculars, and it actually turned out pretty fantastic!

Today, you could most likely get a better result using your phone :) Although besides for the Moon, these attempts at deep-sky astrophotography were a bit ridiculous, it immediately made us fall in love with Astrophotography!

In October of the same year, we went ahead and purchased an old Canon t3i on eBay. Our very first DSLR camera! We spent days and days on Stellarium learning about the night sky, and decided to once again go out to the desert. This was the first time we were able to capture the Andromeda Galaxy and the Milky Way, and it was an incredible experience. As you can see we did not even know how to focus correctly!
Next, we decided to buy a Star Tracker and later a full telescope rig. You can read the full Astrophotography story post to learn more about our story.
Our Very First Image of the Night Sky
Looking back at our very first photograph of the night sky, it looked very… boring. We can see a few stars here and there, but nothing is going on. It's as if someone dropped their cheap camera on the ground and the shutter activated on impact while the camera was on a random part of the sky.

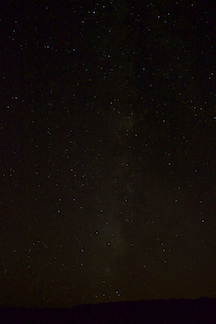
Now if we look at our first picture of the night sky with a DSLR camera... That is a different story.
This is the very first nighttime photograph we took with our Canon t3i. You can obviously see the Milky Way, but there are a few issues here.

The photo is all blurry
The stars look slightly elongated
The foreground does not look straight
There are several things we could have done to obtain a better image, and we're going to tell you now! Here are a few tips we'd like to give you for your first image of the night sky:
Make sure you know how to focus your lens properly! This is actually very easy, just aim your camera at a bright star, zoom in digitally as much as you can (usually x10 for most DSLRs) and rotate the focuser ring on your lens until the star appears as small as possible. That's it, you're in focus!
Apply the 500 or 600 rule. We talked about it before, but ensure your exposure time isn't too long for your lens or your stars will be elongated.
Preferably, make sure your foreground isn't crooked, just so it looks more natural :)
Use an ISO number between 400 and 3200. This depends on the quality of your camera. For the Milky Way, we like to crank up the ISO to 1600 or sometimes, even more, when it is very cold outside. If the air is warm, try to keep it low or the noise in your image will be insane.
Use the fastest possible f/ratio your lens will allow. The lens we used for this shot is the stock Canon 18-55mm f/4.5 lens, so we had no choice but to use an f-ratio of f/4.5. If possible, try to go low like 1.8 or 2.8 if your lens allows it. If the stars on your corners appear triangular, increase that number a little bit to fix that.
Use an intervalometer or a timer. To ensure you do not shake your camera when it is taking a picture, you can either use an intervalometer or simply add a 2-second timer in the camera settings.
Now, go take your first picture and come back here to show us in the comments, we'd love to see it!
The Bortle Scale: Understanding and escaping light pollution
Light pollution is a never-ending growing concern for astrophotography. Every light you see outside, big or small, creates pollution that washes out the wonders of the night sky. This is why you can only see a few stars if you look up at night in any major city, whereas you can see hundreds or thousands of stars when looking up from a remote location far from any civilization.
In Astrophotography, it is very important to "escape" this light pollution by driving away from it as much as you can. We typically drive about one hour away from Las Vegas (Class 9) into the desert to reach a "Class 4" zone on the Bortle Scale.

The Bortle scale is a great way to find out where you are on the scale of light pollution, which ranges from Bortle 9 (most polluted) to Bortle 1 (Darkest possible sky). You can find out the scale of any place on earth using the following map although it is only updated once every 5 or 10 years.
If possible, try to locate the closest dark site to you and make it your new imaging spot! Our backyard is in a Bortle 9 zone.
Thankfully, many targets in the night sky, mostly emission nebulae, can be photographed even under harsh light pollution, thanks to great narrowband filters that block most of the broadband light.
Believe it or not, some of our best images were taken from our heavily light-polluted backyard here in Las Vegas, using narrowband filters. The images below are proof that you can do Astrophotography from the city! You can click on each of them to open up our full blog post and learn more about how we photographed each image. Sadly, some types of deep-sky objects like galaxies are really difficult to capture even with good light pollution filters.


To learn more about the effect of light pollution, read our full post about it: https://www.galactic-hunter.com/post/escaping-light-pollution
Our very first Astrophotography rig
Earlier in this post, we listed what we believe is a fantastic first rig, but what was OUR very first astrophotography setup?
When we decided to purchase a telescope, we decided to go "all in" and use all our savings to get something that would last us for years to come, and we do not regret it! We were really set on a reflector telescope, which worked out in our favor as high-quality Newtonians are usually much more affordable than their refractor counterparts.

We started out with the following:
The Telescope
After weeks and weeks of research, we went with an 8" Newtonian telescope! A fast astrograph reflector with a price tag of $499 (at the time). You can read and watch our full review of this telescope HERE!
The Mount
The mount is the most important and most expensive item in the list. We first added the Orion Sirius mount to our cart. It is a fairly "affordable" mount compared to the others and has tons of great reviews. Right before making our purchase, we had second thoughts and decided to spend a little more money to be safe in the long run. We went with the Orion Atlas EQ-G which has a higher payload than the Sirius. We loved this mount but stopped using it once we got the ZWO AM5.
The Camera
We already talked about the camera, which was at the time the Canon T3i which we bought used from eBay. A great affordable camera for beginners although today we recommend getting the latest version of the Txi series.
Auto-guiding
We purchased a 50mm guide scope and a guide camera. There were a few other pieces we bought that day, like a coma corrector, a Bahtinov mask, and a laser collimator. You can learn more on our Full Equipment post.
Equipment Upgrades Over Time
A well-known fact about Astrophotography is that you can NEVER STOP SPENDING!
Space is huge. It is almost impossible to "run out" of targets to image, because there are thousands and thousands out there! With that said, after a few years into the hobby with the same equipment, you might at some point feel like you have "plateaued", meaning you cannot get better images with your current gear.
...And this is when you start looking at new cameras, telescopes, and mounts online, as well as your bank account.
As we stated earlier, the mount you initially chose to purchase should last you many years and you should not feel like you need to upgrade it even if you decide to attach heavier equipment to it. There are three main products you might want to upgrade to get better images:
The camera
The telescope
Accessories to make your life easier
Upgrading the Camera:
Starting Astrophotography with a DSLR camera is great, and recommended, but you will at some point want to get an astronomy-dedicated camera. The main feature of such cameras is that they have a cooling system. This allows the camera sensor to reach temperatures of -10C, -20C, or even lower and almost completely eliminate noise. The drawback is that they need to be plugged into both a power source and a laptop, and have a steeper learning curve than DSLR cameras. Also, in case you didn't know, astronomy-dedicated cameras do not have an LCD display. They look like the image below.

There are two main types of astrophotography cameras:
One-Shot Color
These have a similar sensor as a DSLR camera and are pretty easy to use. The pictures are in color.
Monochrome
Those cameras shoot in black and gray, and the use of color filters is required to obtain a color image during processing. Monochrome cameras are more difficult to use because you will need a filter wheel and several filters to use it. There are several types of filters, broadband and narrowband.
Broadband filters are:
L (Luminance)
R (Red)
G (Green)
B (Blue)
Narrowband filters are:
HA (Hydrogen Alpha)
SII (Sulfur II)
OIII (Oxygen III)
Galaxies, clusters, and a few types of nebulae are most often shot in LRGB. Emission nebulae and a few other objects are best shot in Narrowband. Narrowband is also great when shooting from light-polluted areas.
Whichever camera you decide to upgrade to, know that the learning curve is steep but short. We upgraded from our DSLR camera directly to a cooled monochrome camera, and only ran into a few issues at the beginning while learning. Although narrowband filters are excellent if you have to image from your light-polluted backyard, know that you can also purchase a duo-band, tri-band or quad-band narrowband filter to use with your One-Shot-Color camera or DSLR, which will allow you to shoot in narrowband without a monochrome camera.
If you need some tips when upgrading from a DSLR camera to an astrophotography dedicated camera, the video below might be useful!
Upgrading the Telescope: This will depend on what telescope you started with. If you started with a low-quality instrument, one that gives you terrible chromatic aberration, for example, you will definitely want to upgrade to a better product as soon as possible.
If, like us, you are very satisfied with the first telescope you purchased, just keep it for the long term! The only reason why you'd want to get a new one is because you would like a different field of view to target a wider range of objects.
On the left, M45 at 800mm FL. On the right, the same object at 344mm FL.


Our first telescope was an 8" Newtonian telescope: A pretty bulky reflector telescope with a focal length of 800mm. The second telescope we added to our equipment was a small refractor telescope that was portable and light. The focal length was 344mm. It is great to have two very different instruments as both can serve different purposes and be used for different targets. If your first telescope was a small wide-field telescope and you now want to get a second one, get a larger one that has a longer focal length, or the other way around!
Upgrading your accessories: Another thing you might feel like upgrading is your accessories. Better accessories will make your life easier and can sometimes be difficult to live without!
The first accessory that comes to mind is the Polemaster from QHY, which allows you to polar align very accurately in seconds. Another one would be the Pegasus Powerbox, with which you can "divide" power into all your gear with only one cable coming from the battery. Note that you do not need these two things if you own the ASIAir from ZWO. With it, you can also control your mount, cameras, and more from your phone or tablet. Lastly, an electronic focuser is also a great tool to have as it allows you to focus your telescope automatically from software.
How to connect your DSLR camera to a telescope?
One of the first questions beginner astrophotographers ask google when they receive their telescope is "How to attach a DSLR to a telescope?". Below, we will explain the most common way to connect the two, but make sure to check out our full tutorial post and video about this subject where we go over several different scenarios on attaching a camera to different types of telescopes.
In both cases below, you will need to purchase a T-Ring. It is a thin, affordable metal ring that replaces your camera lens. It has a thread on the other side allowing you to screw in in other adapters. Make sure to get the right T-Ring for your camera depending on the brand you are using.
If you own a Newtonian reflector:
The most common way to attach your DSLR camera to a fast astrophotography reflector telescope is to use a coma corrector. A coma corrector screws into the T-Ring on your camera, and directly attaches to your telescope's focuser. Coma correctors are used to correct the "coma" or bad shape of the stars in the corners in your images which appear when using a fast reflector (usually f/5 or faster).
If you own a refractor telescope:
This is similar to a reflector telescope as you just have to replace the coma corrector with a field flattener. Field flatteners are used to ensure all the stars in your images look round and pinpoint, and are needed with almost any type of refractor telescope. Petzval refractors, like the Askar FRA300 Pro, have a built-in corrector and so you can just attach the camera directly to the focuser using only the T-Ring.
How to use an intervalometer
An intervalometer is a small device that allows you to control your camera's exposure time, delay, number of shots, and more. It can be wired or wireless. We use a wired intervalometer as those are usually more affordable.
To use an intervalometer, simply plug it into the camera, and make sure you are in "BULB" or "MANUAL" mode to use it. For Astrophotography, it is usually better to be in BULB as it will allow you to take very long exposures.
Most intervalometers have just a couple of buttons to change the mode, and a directional arrow pad to increase or decrease the numbers on the display. For Astrophotography, we mostly care about two modes:

The Exposure Time: We can set this to any number of seconds we'd like. For example 30 seconds, 600 seconds, or even more!
The Number of Shots: We often want our camera to keep shooting all night long without stopping. You can either select a ridiculously high number (999) or, if your intervalometer allows it, select the infinity symbol.
One thing to be careful about if using a wired intervalometer with a telescope is where you decided to place it when launching your series of photos. Ensure the device is in the safe location even when the mount is moving, as you do not want it to abruptly fall off or its cable to get stuck!
How to choose your first telescope
If you are part of any astronomy community, such as an astronomy club or an astronomy group on Facebook, the one question that comes up the most is "What telescope should I buy?"
We'll make a more in-depth post about this question in the future, but for now, let's quickly go over this topic and see what we suggest.
Before we can answer your question, we need to ask you one: Do you plan on doing visual astronomy or astrophotography?
If you intend to do visual astronomy:
The first telescope we would recommend for people who want to do visual astronomy is a Dobsonian telescope. Below is an all-time favorite for most beginner astronomers, an 8" Dobsonian.
This is an 8" reflector with a great focal length of 1200mm. Another option is to get the size up, 10", or even bigger, 12". Just know that the bigger it is, the bulkier and more difficult it is to transport and setup.

Specifications:
Instrument type: Reflector
Aperture: 8"
Focal Length: 1200mm
Focal Ratio: f/5.9
Telescope Length: 46.13 in.
Telescope weight: 24.5 lbs
Mount Type: Dobsonian
Mount weight: 27.7
If you intend to do astrophotography:
We have a full guide you can read where we go over five refractor telescopes within your budget. In there we also talk about our favorite beginner reflector telescope which is very affordable.
The key to a great beginner astrophotography telescope is its aperture and its speed (measured as focal ratio).
The speed of a telescope tells how fast it can collect light, meaning you can get great images with little integration time compared to slower instruments. We do our best to only image with telescopes that have a focal ratio of f/5 or faster (the lower the number the better). F/5 is a great base for most refractors. Refractors are usually much more expensive than reflector telescopes and rarely go below f/4.5. Reflector telescopes have a much simpler build and so are usually more affordable.
Those are most of the time fast instruments and can be great for beginners who do not mind learning how to collimate the mirrors. Our first telescope was an f/3.9 reflector, and we paid less than $500 for it!
Make sure to visit our full guide to get more information about what telescopes we suggest for a beginner, but let's list our two favorite ones below:


An 8" Astrograph f/3.9 was our first telescope. It is a Newtonian reflector that (used to) cost $499. 8" astrographs are in our opinion the best reflectors for the price. Some beginners may be deterred by the fact that you will need to collimate this telescope every single time before imaging with it. As we've shown you several times on our YouTube channel, it only takes seconds to perfectly collimate this telescope using a laser collimator, so don't be afraid! Below is one of our first images captured with this instrument, the Great Orion Nebula. And guess what, this was only one hour of total exposure time!
The Orion Nebula photographed with a DSLR camera and an 8" reflector

The Askar refractor is our favorite portable telescope. It is small, lightweight, and does not require any special adapters to attach your camera to it. We love using this telescope for large objects as it has a wide field of view. The image of the Heart Nebula below was taken with the same telescope, although it is the slightly larger FRA500 version and not the FRA300. Click the image to see it in high-resolution.

To conclude, try to get a feel of what kind of telescope is best for you (reflector or refractor). If you are leaning towards a reflector, definitely go with an 8" Astrograph. If a refractor is what you want, read our full guide and pick one from there!
Small vs Large telescopes: Is bigger always better?
Let's talk about focal length for a moment. Telescopes come in many different sizes and shapes. If you decided to buy a small, portable refractor, it is likely to have a short focal length, giving you a wide field of view. If you picked a reflector like the one listed above, you'll have a longer focal length and so your field of view will be more narrow.
Unlike for the aperture and focal ratio, a high or low focal length number has nothing to do with the telescope's quality. A telescope with a short focal length is perfect for wide objects, for example, the Heart & Soul Nebula, the California Nebula, the North America Nebula, and many more. A long focal-length telescope is fantastic for smaller objects, like most galaxies, globular clusters, and small nebulae.
As an example, look at the two comparison images below. The one on the left is the Eagle Nebula (M16) taken with a 344mm focal length telescope. The image on the right shows the same object, this time with a focal length of about 800mm. As you can see, both images look great, but the 800mm version does not show all the gases all around the object.


In short, bigger is not always better. It is, if you plan on imaging mostly small nebulae, galaxies, and clusters, but is not the best when it comes to large objects, especially nebulae with tons of gas all around.
The Mount: How tracking works
When astrophotographers tell you that the mount is the most important piece of equipment, are they exaggerating? Is the mount really more important than the telescope itself, or the camera?!
They're absolutely right.
No matter if you have the best telescope in the world, the newest camera, and all of the high-end accessories in your setup, a bad mount will not get you any good images. The job of the mount is to counter the rotation of the Earth, in other words, to track the stars. This is achievable by first polar aligning the mount (meaning accurately aligning the polar axis on the North star: Polaris). There are several types of mounts out there, but most amateur Astrophotography mounts are the motorized German Equatorial Mounts, or "GEM". It is made up of two axes, the Right Ascension axis (RA) and Declination axis (Dec).
Astrophotography mounts need a power supply as they are motorized. You can usually easily hook it up to a wall outlet if imaging from your backyard, or plug it into a portable battery if imaging from out of the city.
The importance of balancing your equipment
Depending on what you plan to attach to the mount, you most likely will need to add one or two counterweights to perfectly balance your equipment. This will ensure that the gears in the mount do not overheat or get damaged as they slew the payload around. Balancing your equipment should be done before every imaging session, in both the Dec and RA axis. Some common guiding issues are often linked to poor balancing, which is a shame because achieving the perfect balance with any equipment is usually really easy!
Note: Strain Wave Gear mounts do not need to be balanced, as long as they are roughly okay.
How to polar align?
Polar aligning is a crucial process that has to be done after setting up your equipment and before starting imaging.
An incorrect polar alignment will result in elongated stars and guiding issues, no matter the quality of the mount. A few years ago we made a tutorial post about how to setup your equipment and polar align it, but let's go over it quickly here.
When setting up your mount, ensure that you are pointing the polar finder (built into most mounts) towards Polaris. If you are setting up during the daytime, do your best to face North. You can use an app on your phone to know where North is approximately.
Ensure that your mount is perfectly leveled. This is actually not that crucial down the line, but it is a good habit to take and it's always better to be level.
Also, make sure that your Altitude is correctly set. You usually set the altitude on your mount by turning two knobs that raise or lower the angle of the mount's head.
If your mount has a built-in polar scope, look through it and try to locate Polaris. If you are confident you are pointed in the right direction, it most likely is the brightest star in the finder. Note that you might have to turn your mount on to illuminate the finder.
In the polar finder, you should see some drawings. One shows Cassiopeia, another the Big Dipper. Manually rotate the mount's declination axis until the angles of the constellations match the ones in the sky.
Next, all you need to do is to use the two knobs on each side of the mount to slightly turn the mount left or right. Play with these knobs until Polaris sits exactly inside the tiny circle seen in the image below. You may also have to fiddle a bit with the altitude knobs one more time.

And you are now correctly polar aligned! Make sure to not bump into your mount throughout the night or you will need to redo this process. Yes, it happened to us a couple of times…
You can also polar align without having to break your back looking through the polar scope. Nowadays, several types of software allow you to quickly achieve great polar alignment right from your computer, phone, or tablet.
The three most popular software used to polar align are:
The QHY Polemaster (done from your computer, one accessory needed).
The ASIAir (can be done with your phone or tablet, no accessory needed).
SharpCap Pro (done from your computer, no accessory needed).
The one we use is the QHY Polemaster. You first need to attach the Polemaster camera on the front of your mount with the adapter that comes with it. From there, you can polar align the mount using your computer in just seconds. The ASIAir and SharpCap are also great but we are just used to the Polemaster and so keep using that method. Learn more about the QHY Polemaster on our full review post and video.
Cable Management
Before ending this section about the mount, we thought we'd add a note about cable management. This is often overlooked yet it is very important when running a full astrophotography rig.
This might not apply to you if you are using a DSLR camera with a wireless intervalometer and do not yet own any other accessory that may have cables.
But if you do use products that need to be plugged into either the mount, the camera, or the computer, you WILL need to pay attention to your cable management situation. Such products include cooled cameras, electronic focusers, acquisition devices, guide cameras, and more. If you do not care about tidying up your cables and simply let them all dangle free, chances are one of them will get stuck as your mount is slewing.
Best case scenario, your stars will have trails, worst-case scenario, you will destroy your mount, camera, or other accessories.

Using little straps like the VELCRO cable ties is a great way to tidy up your cables and ensure that they all stay close to each other. Another thing you can do if you have many power cables is to use a device like the Pegasus Astro Pocket Powerbox or the ASIAir. This will ensure that only one power cable goes down to your battery on the ground, while the other ones get their power from the box itself.
Some mounts, like the Paramount MyT seen on the left, have very smart features like ports on the dove plate section itself, ensuring that no cable ever goes from the telescope directly to the ground and so making it impossible for any cable to get stuck!
Check out our full review of the MyT mount if you'd like to learn more.
Stacking: What it is and why bother?
You may wonder: Why can't you take just one image of a target and be done with it? What is the point of staying up all night and taking hundreds of images of the exact same thing?
The answer is simple: Signal-to-noise ratio.
The more data you combine, the better the image will turn out. Stacking several frames allows you to "see" more of the object you are photographing, and to cancel out most of the noise (more on that in the next section about calibration frames).
The photo on the left shows a single 30-second shot of the Milky Way band. The one on the right shows the exact same thing but this time with 50 frames stacked. Notice how much brighter and more colorful the Milky Way band is. It is hard to see because both images are unprocessed but the one on the right is also less noisy!


Some astrophotographers do not bother with stacking and are very happy with taking single shots of several objects every night. If you care about having the best possible image, you will need to learn how to stack your data. This is also called "pre-processing" your data because stacking comes right before the workflow you would usually follow when processing a deep sky image. We have a premium tutorial available where we teach you how to stack and process images which you can get here: Our Beginner PixInsight Workflow
One question that often comes up is: Will my image get better the more data I stack? That's a great question, and the answer is yes BUT there is something you should know.
The quality of your data will greatly improve but will reach a "quality plateau" at an exponential rate as you stack more and more frames. Here are some examples assuming each frame is 180sec long:
Top left: Single 3-minute shot | Top right: 10 frames stacked
Bottom left: 25 frames stacked | Bottom right: 75 frames stacked


The difference in quality between a single shot and a stack of 10 frames is enormous.
The difference between 10 frames and 25 frames is very good.
The difference between 25 frames and 75 frames is pretty good.
The difference between 75 frames and 300 frames... may or may not even be noticeable.
Taking Calibration Frames
Calibration Frames are both extremely important and extremely confusing for beginners. Here we will try to explain what they do and how to take them.
The three main types of calibration frames are:
Dark Frames
Bias Frames
Flat Frames
These frames are usually taken after an imaging session and are then stacked along with your "regular frames" (AKA Light frames) during pre-processing.
Dark Frames:
The main goal of Dark Frames is to reduce the noise in our image.
These need to be taken in complete darkness, so the best way to do so is to attach the cap of your camera so that the sensor is fully covered and no light can reach it. The exposure time, ISO and/or Gain of your camera need to be the same as when imaging your target. It is also very important that the temperature matches! We usually take 15 dark frames.
Bias Frames:
The main goal of Bias Frames is to reduce the noise in our image also. These are usually only needed if imaging with a DSLR camera. We never take bias frames with our cooled astronomy cameras.
The settings should all be the same, just like for the darks, and the cap must be on. The only thing that changes is the exposure time. To correctly take bias frames, select the fastest possible exposure time your camera will allow, and shoot away! We usually take 15 bias frames, which takes less than 3 seconds.
Flat Frames:
The main goal of Flat Frames is to get rid of unwanted artifacts and vignetting in our image.

Unlike Darks and Bias, Flat frames cannot be taken after taking off the camera from the telescope. It is very important to take these either right before or right after imaging your target. It is crucial that the orientation of the camera in the telescope stays the same, as well as all settings used.
Flat frames should be taken either during sunset/sunrise when the sun is not too bright yet and the sky has a nice pale blue. They can also be taken during the night with the use of a light panel as shown in the picture below. The exposure time will depend on your histogram, and you will for sure need to take several test shots before getting it right. Try to find the perfect exposure time (usually around a second or so) where your histogram peak is exactly in the middle of the graph.
You may need to use a plain white tee shirt over the telescope if the sky or light panel is too bright.
Dark Flats:
Dark Flats are the equivalent of Bias Frames but for cooled astronomy cameras. These need to be taken at the exact same exposure time and setup as the flat frames, but with the cap on.
Processing Astrophotography data
Believe it or not, processing astrophotography data is sometimes as difficult as capturing the data itself! Prepare yourself for hours and hours of watching tutorials, reading tips, and asking others questions.
There are several software out there built specifically for processing astrophotography images (Deep Sky Stacker, PixInsight, APP, Prism, SiriL, Star Tools…) but the two main ones we will talk about here are the following:
Deep Sky Stacker
This is free software available on Windows that is perfect for beginners. It is not too difficult to use and is great for the basics. It will stack your images and give you a few sliders to play with to enhance your final image. Although it is free and simple to use, it is very limited in terms of features.
PixInsight
The best of the best! But also the most difficult one to learn. There are no limits as to what you can do with PixInsight. This is what we have been using for the past 5 years or so and we are still learning! PixInsight has an insanely steep learning curve and is costly, but we recommend that you jump straight into it as soon as you can because you will most likely want to dig into it at some point in the future. It is better to learn now than later!
We have several tutorials on PixInsight that you can find here: https://www.galactic-hunter.com/learn-pixinsight-tutorials
We also have several processing tutorial videos on our YouTube channel.
Lastly, you can get premium PixInsight processing guides where we show you the exact workflow we go through to process our own images.
Included are 20 lessons, our process icons, our raw data, and 18 walkthrough videos. We also have a basic version available that focuses more on RGB data. You can also get dozens of different raw data sets taken with different cameras, and telescopes under different light pollution settings if you support us on Patreon.
Other Types of Astrophotography
Astrophotography is not limited to galaxies, nebulae, and clusters! You can do several other types of astrophotography with and without a telescope. Here are a few options.
Milky Way Astrophotography
This is what most people start with, as all you need is a DSLR camera! If all you have is an old DSLR camera with the stock 18-55mm lens, just try setting it on top of the car and shoot in the direction of the Milky Way band! The only tricky part here is to find the perfect focus, so make sure to read or watch our tutorial about it! We also have a premium online course which teaches you all about Milky Way photography!

As you get better and better, you will be able to take incredible images of the Milky Way. The best time to shoot it is during the Summer, as the core of the Milky Way is bright and visible.
Planetary Astrophotography
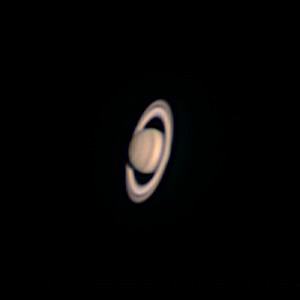
Planets are a whole different animal than deep-sky objects. Doing planetary imaging is not at all similar to taking a picture of a nebula or a galaxy. For a quick and easy image of a planet, you can simply use a DSLR camera and take a single shot of the solar system body of your choice (the easiest ones being Mars, Saturn, and Jupiter). Both Saturn and Jupiter can be photographed without a telescope, by using a telephoto lens (200mm or more) on a DSLR camera. You will not be able to resolve any detail, but several of the moons should be present in the image!
Saturn with a DSLR camera (left) vs with an astronomy camera (right)


Using a dedicated astronomy camera and a telescope, planetary imaging is different in the sense that you do not really stack long exposure frames, but rather take a video of the object and later stack the best frames from that video on dedicated software.
Lunar Astrophotography
The moon might be annoying when trying to capture deep-sky objects due to the light pollution it produces, but you can't really tell it to go away. When the moon is up, all you can do is embrace its presence and try to make the best out of it… so here comes Lunar photography!
Imaging the moon is somewhat similar to imaging planets. It is very bright so there is no need for long exposure shots, and stacking is also often done from a video. The moon is very easy to photograph with a DSLR camera though and you really don't need to worry about stacking or taking videos at all if you are just doing this for fun. Click on the image below to check out several of our fun shots of the moon taken over the years.

And more!
Astrophotography is not limited to deep-sky objects, the Milky Way, planets, and the moon, there is much more!
You can attempt to photograph the ISS for example, which is not an easy feat due to how fast it streaks across the sky. You'll also have to plan carefully and know exactly what day and time it will fly over your city.
You can also image comets! These often pop up in the sky when you expect it the least, and stay visible for days or weeks before going away. Most of these are not impressive and just look like a small green or white blob, but every few years, a large comet with a long tail may show itself and make the news! This was the case for Comet F3 NEOWISE, shown below.

You can also expand on your wide-field astrophotography and image some constellations, do some meteor shower composites and star trail photographs... The choice is yours!
Conclusion
Astrophotography is one of the most rewarding hobbies. Sure, it has a steep learning curve, can get costly, and is frustrating at times, but the end result is always worth it!
If you are a complete beginner, try not to skip any steps in your learning journey. Start small, with a DSLR camera and a tripod, and upgrade only when you feel ready and confident.
To anyone reading this, if you are still unsure about how to get started, or if you need help with anything, absolutely anything, please reach out to us! You can either send us an e-mail, comment on this post or make a new thread on the forum for everybody to see. The Astrophotography community is by far the nicest and most helpful community we know, and you will never feel alone if you join the hobby!
Also be sure to check out the Galactic Course, which might be a great life-long investment!
We hope you liked this guide on how to start astrophotography, and we wish you the clearest of skies for the nights to come!
Clear Skies
Antoine & Dalia Grelin
Galactic Hunter


Just taken up Astrology and Astrophotography to keep me occupied in my retirement. As a complete beginner this guide is a real gem. Easy step by step tutorials that stick in your head and guide you in the right direction so that you do not lose heart and give up. Good advice on the type of equipment needed so that you do not waste money. Brilliant!!
@rudya2007 Thank you so much! We've been working on this post for many months but finally had time to finish it haha :)
What an EXCELLENT guide! Wish it was available 8 months ago when I got the thought I could do astrophotography. Keep up the good work!