
How to Choose the Best Gear for Milky Way Photography
- Antoine & Dalia Grelin

- May 1, 2023
- 7 min read
Updated: Jun 7, 2023
Milky Way photography is typically the first challenge beginner astrophotographers decide to tackle when getting interested in the hobby. Finding the bright Milky Way band in the night sky and seeing it appear on your camera screen is exhilarating. There are certain conditions that need to be met for a Milky Way photograph to look its best, such as the quality of the sky, the time of year, and where you photograph from. One more important factor is of course the gear you use!
In this guide, you will find information on what equipment we suggest for capturing the Milky Way, with recommendations on what type of camera is best, what lens to use, if you choose use a star tracker, and any accessories you might need.

The Milky Way, or rather a part of it, is visible from both the northern and the southern hemispheres. From our location, the west coast of the United States, the brightest part of the Milky Way band is best observed in the Summer months. This is because from our location and during that time, our planet faces the core of the galaxy during the night.
Recommended Gear for Milky Way Photography
If you're looking to get the best possible picture of the Milky Way, you'll want to get the proper gear! A camera is an obvious answer, but what else should you have in your photography arsenal? Depending on your budget, you might have a different setup than what we recommend so do not be discouraged if you cannot purchase something. We believe it's best to learn with what you have and what you can manage until you can upgrade.
Below we've listed recommended products for Milky Way photography.
1. A DSLR or Mirrorless Camera
This is the bare minimum requirement, as you need to be able to control your exposure time. Any DSLR camera will work just fine, even if the one you have is 10 years old! Several example images we share in this article were taken with a T3i or a Canon 7D Mark II, which are older cameras but work just the same. We gravitate toward the Canon brand, but this is just a preference.
If you already own a DSLR/Mirrorless camera: Use that, even if it's old and beat up!
If you do not yet already own one, below are some good options for new cameras to purchase.

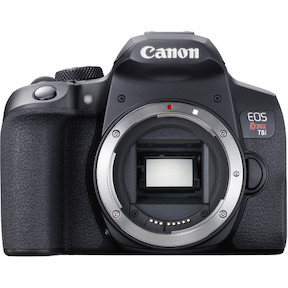


Canon Txi series: The Canon Txi series (T3i, T4i, T5i...) are affordable yet excellent cameras for astrophotography.
These are some of the best beginner DSLR cameras on the market if you're just getting started, and we suggest getting whatever is the latest release in the Txi series (currently T8i) if you're looking for a camera that doesn't break the bank.
Canon 5D series: The Canon 5D series (5D Mark II, 5D Mark III, 5D Mark IV...) are among the top Canon full-frame cameras for nighttime photography. One of these would be a great choice for capturing the Milky Way, and can be affordable if looking online on eBay and other similar sites.
The cheaper Canon 6D Mark II is also a great choice for Milky Way, especially when modified for astrophotography.
Astro-modified cameras:
If you're looking for a camera that is built for astrophotography right out of the gate, we would recommend an astro-modified camera. We use the Canon Ra, but this product has been discontinued.
If you can find the Ra or another astro-modded camera used, we'd recommend it! Your best method of finding it used will be on reselling sites - just be wary of the condition of the camera.
You can also send your current camera to a professional to be modified. We recommend Astrogear.
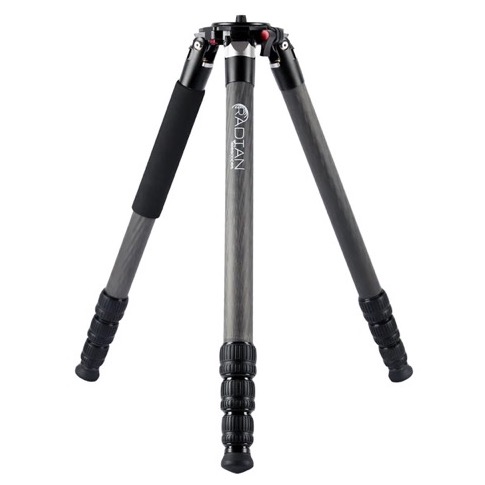
2. A Sturdy Tripod
After the camera, a sturdy and reliable tripod is what you need for your Milky Way photography session. A good tripod allows you to have the stability you need during long exposures, and will not be too affected by vibrations from you moving around.
We started with the Heavy Duty Paragon XHD tripod from Orion Telescopes and Binoculars. It is very sturdy, well built, and still works well after using it for 10 years! We then upgraded to a much lighter and more portable tripod made of carbon fiber, the Apertura tripod. Both are strong enough to support various sky trackers and cameras.
Note that the Radian tripod does require a separate ball head. This will let you angle your camera in any direction. You can also add a ball head to the Paragon tripod, but it is not as crucial as you can change the direction of 2 axis by default.


3. A Shutter Controller / Intervalometer
We touched on stability above in the tripod section and this is important for great-quality images. The less time you spend fiddling with your camera while it's taking photos, the fewer risks you take adding vibrations and blurriness to your images. So how do you control the camera without touching it? With an intervalometer! This camera accessory comes either wired or wireless and allows you to change the settings on your camera. You can alter the exposure time, delay, intervals, and the number of shots.
This accessory is optional, because some cameras have a built-in intervalometer feature. If you cannot afford one, no need to worry. You can still do Milky Way photography without it. Just be sure to add a 2 or 10-second delay in your settings, that way, the camera will stabilize for a while after you press the shutter.


Note: These products may require batteries so be wary before heading out to the field.
4. The Camera Lens
The lens of your camera is what has the biggest impact on your final photo. There are a few factors to consider, which are:
The quality of the glass used
The focal length
The aperture
This might be hard to comprehend if you are new to photography. The glass quality is important because the stars in your images will be free of chromatic aberration (weird colors like green and magenta) and coma (elongated stars on the edges of the frame). Purchasing a lens from a reputable brand is the way to go although it may be pricey.

In our experience, the optimal focal length for Milky Way photography is around 14mm.
Lenses that are under 10mm may show the entire band in the night sky but will produce a fisheye effect - which is not a great look. In our experience, a 10mm lens on a cropped-sensor camera offers a great field of view on most of the Milky Way band, as you can see on the right.
Going too far over can also produce effects you might not want. For example, a focal length over 50mm is too zoomed in and will only reveal specific regions of the Milky Way.
However, for mosaics (advanced processing skills needed) you can use a 50-85mm lens if you are searching for a challenging project in the summer.
Lastly, the aperture of the lens is the speed at which it collects light, the lower the number, the faster the lens! You'll want a fast aperture (f/4 or under) so that you can get as much of the Milky Way brightness in your image before your exposure is over. We usually shoot at f/2 or f/4 depending on the lens. Some lenses will allow you to shoot at very fast speeds (f/1.4, f/2, etc) but will introduce coma or other issues when wide open. You'll likely need to choose a slightly slower aperture to get round stars all over your field of view. F/4 is usually the sweet spot for most lenses.


Our favorite lenses for Milky Way photography are:
10mm lens:
14mm lenses:
Samyang XP 14mm f/2.4 [Our current main lens!]
Sigma-Art 14mm f/1.8 (Canon) and Here for Nikon
24mm lenses:
A Star Tracker
This is an optional addition to your rig, and can be a bit tricky to use if you are a complete beginner, but it will give you a much better image of the Milky Way!

Because you will no longer have to worry about star trails, you'll now be able to increase your exposure time (from a few seconds to several minutes), reduce your ISO (to reduce noise), and even stack several pictures into one if needed.
Star trackers only take a few minutes to set up, and are good to have if you intend to dig deeper into wide-field astrophotography.
The way a star tracker works is very simple. You need to align it on the North Star (Polaris), and simply turn it on! It will slowly rotate on two axes (declination (Dec) and right-ascension (R.A) ) and follow the movement of the sky at a regular pace.


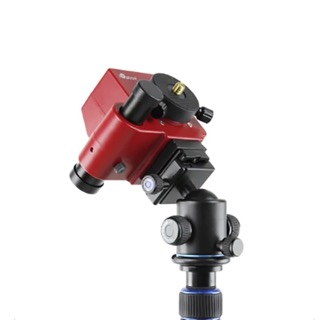


Two star trackers that are widely popular are the Sky-Watcher Star Adventurer Pro and the iOptron SkyGuider Pro. They are similar in terms of their size, weight, and payload capacity. Both models have a "Pro" version that comes with a counterweight bar and a small counterweight, which is useful if your camera/lens combo is heavy.
Another option is to get something like the ZWO AM3. This is also excellent for tracked Milky Way photography, and it can also hold much heavier things, like telescopes, without bothering with a counterweight.
Would you like to learn Milky Way photography with our premium online course?
Join our Milky Way astrophotography course!
It is divided into two sections, beginner, where you'll learn how to take your very first picture of the Milky Way, and advanced, where we teach you how to take Milky Way Arch panoramas, tracked Milky Way shots, stacking, and more.
Final Thoughts on Milky Way Equipment
If you're just getting started in astrophotography and are planning on getting your very first Milky Way shot, we wish you the best of luck!
In your case, we suggest going with a setup that does not involve a star tracker just yet, just so you can learn how to take a few simple shots with just a tripod. Once that's done, you definitely should invest in a star tracker, which will have a huge impact on how clean and impressive your Milky Way images will be.
Be sure to check out our other Milky Way tutorials, and don't hesitate to let us know if you have questions below!
Clear Skies,
Galactic Hunter


Really like your website. I have learned a lot from you. You guys are awesome keep up the great work.
Geoff nash