
PixInsight: How to Create a Mosaic in 3 Easy Steps
- Antoine & Dalia Grelin

- Sep 13, 2023
- 4 min read
The thought of making an astrophotography mosaic can be daunting, not only because shooting several panes can be difficult and time-consuming, but also because combining the data can be tricky!
In this tutorial, we'll tell you how to easily combine our data from different panels into one mosaic image using PixInsight. The entire process, not counting the loading times, should take you approximately 5 minutes!
Be sure to watch our full walkthrough video at the end of this post if you need to see the entire process second by second.

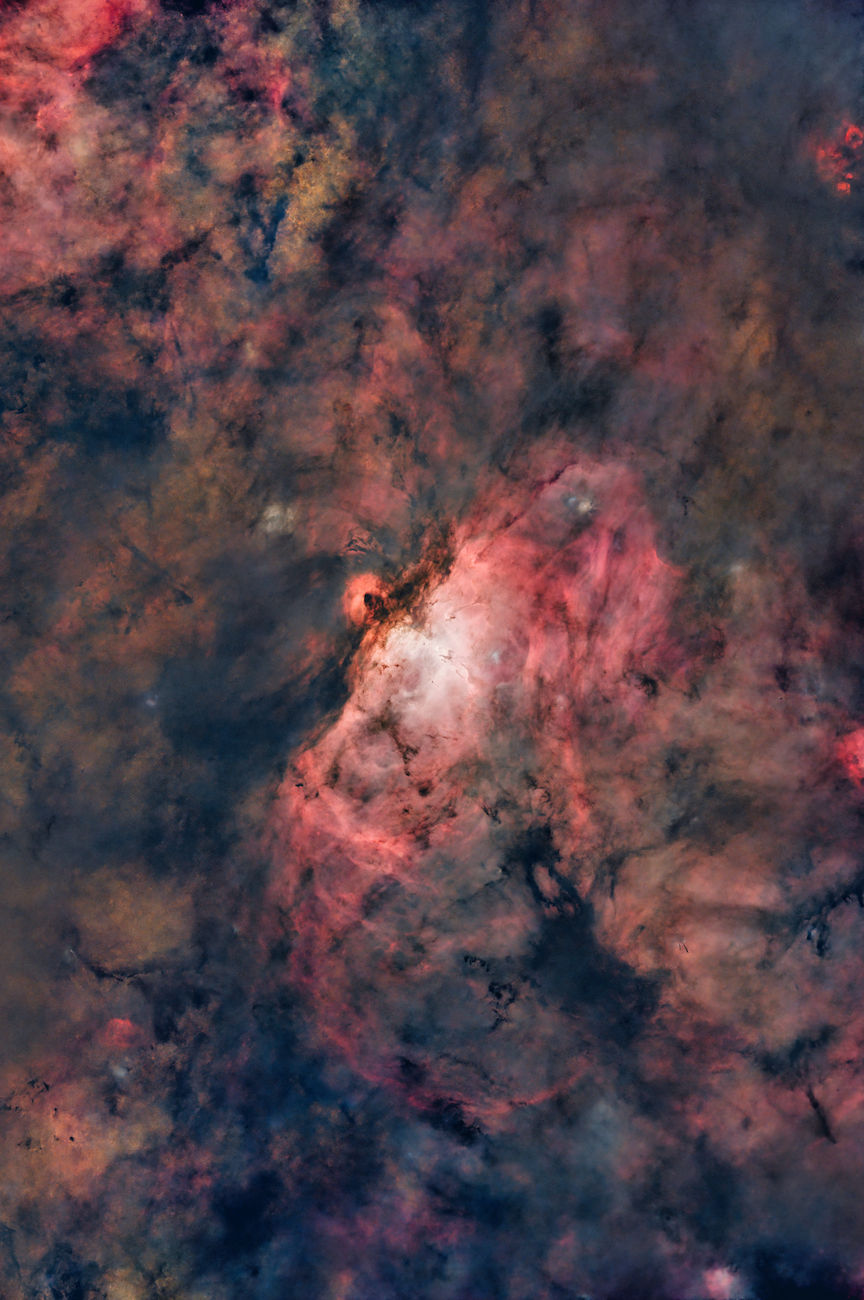
For this example, we'll be using our 2x2 image of Rho Ophiuchi! So... prepare your files, and let's stitch them all together!
Pre-Requisites: Calibration/Debayering/Stacking
This tutorial will only guide you through the mosaic creation, and assumes you've already calibrated, debayered (if needed), and stacked your data. You can use Weighted Batch Pre-Processing to do this, and as a result, should have one master file for each panel. For example, if your mosaic is supposed to be a 2x2 mosaic, you should have 4 master files!

Above you can see the master files I will be starting with. I have also added the number of frames for each next to the Panel number, as I was originally planning on shooting until each panel reached 40 frames, but ended up being satisfied with the current numbers.
Step 1 - Platesolving Each Panel
The first thing we need to do to create our mosaic is to plate-solve each of our master files. This will tell PixInsight exactly where in the sky each pane is located and will be very important for the next step!

To do this, do the following:
Go To Script > Image Analysis > Image Solver
Select "List of Files"
Click on "Add Files" and import each master
Nowadays, almost all images already have the coordinates, location, and telescope information saved to the FITSheader. If that is the case for you, the "Image Parameters" section should already be populated with all the correct information, and you can leave it untouched.
If it is not, you must manually add the coordinates of your imaging location, the focal length of your telescope, the pixel scale, and the master file's RA/Dec numbers. You can do that by either plate-solving it on a website or by clicking on Search and finding your target.
Leave every other setting as default
Launch the script
The script should now platesolve your images, and save them in your folder with "_WCS" at the end of the name.
If you encounter an error, be sure the information under "Image Parameters" is all correct. Also try to flip your masters if the data was taken with a telescope that has mirrors, for example, a Celestron RASA or a Newtonian Reflector.
Step 2 - Matching the Placement of Each Pane
Next up is going to be to place our files properly on our canvas! For this, we'll use another simple script within PixInsight.

This script is very straightforward and quick to use. Do the following:
Go to Script > Mosaic > Mosaic by Coordinates
Click on "Add Files" and import your newly created masters that end with "_WCS"
Leave all settings as default
Select a folder in "Output Images"
Launch the script
The script will now create yet new master files, but this time will add "_registered" at the end of the name. Feel free to open the files once this is done to understand what the script did to your images!
We only have one step left!
Check out our PixInsight Tutorials page for more tips on Astro-photo processing.
Step 3 - Merging the Files into a PixInsight Mosaic
We're already at the last step, can you believe it?!
This time, we won't be using a script, but instead a regular process. Here is what to do:
Go to Process > All Processes > GradientMergeMosaic
Click on "Add Files" and import your latest master files, the ones that end in "_WCS_registered"
Now for the parameters: I got something very nice with the default values, but this seems to depend on the image. I would suggest first launching the process with the basic parameters and then zooming in on your mosaic to see if you can find any flaws. If you do find a lot of issues, like heavy lines or distorted stars, you'll need to play with different settings. I would suggest trying to change the Type of combination to "Overlay" instead of "Average", and then increase the shrink radius. It is a bit of a game of hit or miss until you get the perfect outcome.

The result of this should be one single mosaic image. You then simply need to crop the edges appropriately and process the data as you would with any other file!
Would you like to learn Milky Way photography with our premium online course?
Join our Milky Way astrophotography course!
It is divided into two sections, beginner, where you'll learn how to take your very first picture of the Milky Way, and advanced, where we teach you how to take Milky Way Arch panoramas, tracked Milky Way shots, stacking, and more.
Full Walkthrough Video
If you need more help on how to create mosaics using PixInsight, be sure to watch the tutorial video below as it might be easier to understand and follow along!
Final Thoughts
Making a mosaic using PixInsight is not as scary as it seems! It is overall very quick and easy unless you need to fiddle with the settings in that last step.
If you do not like using PixInsight for stitching your mosaic files, Astro Pixel Processor is supposed to be very easy to use and the best in that area, but it is not free either and we have never tried it.

Need help processing your data? Check out our processing services or download our processing workflow guide!
Be sure to check out our other PixInsight tutorials, and don't hesitate to let us know if you have questions below!
Clear Skies,
Galactic Hunter


Comments