
Vespera - Small and Powerful Smart Telescope - Full review
- Antoine & Dalia Grelin

- Oct 15, 2022
- 16 min read
Updated: Nov 14, 2023

Two years after the successful release of Stellina, startup company Vaonis announced Vespera, a smaller, lighter, and much more affordable smart telescope.
Vespera is easier to set up, and shares most characteristics of its more expensive version. When compared directly with Stellina, Vespera does have both ups and downs, which we will cover in this post.
If you don't know what Vespera is, it is a small autonomous telescope with a built-in computer and camera. It is controlled with an app using a smartphone or tablet, and can be fun to use with a group as anyone within range can connect to it. Vespera was designed to take images of deep sky objects, the moon, and even the sun thanks to the ability to use filters.
It has several awesome features that both beginners and advanced astrophotographers will enjoy, and is marketed as being able to capture beautiful space images even from the city.
In this review, we will tell you everything you need to know about Vespera and if it could be a good fit for you. We'll put it to the test from both the city and the desert, and decide whether or not the images are respectable for the price.

Table of Contents:
What's in the box?
Specs & Price
Size, Weight, and Mounting
Singularity App
The Andromeda Galaxy with Vespera
Narrowband Deep Sky Objects Captured with Vespera
Planetary, Lunar, and Solar Astrophotography with Vespera
Astrophotography Rig vs Smart Telescope
Final Verdict | Pros & Cons
If you haven't already, please be sure to read our full review on Stellina, where we explain how this smart telescope works and talk about Vaonis as a company.
You can also watch our review video attached here.
Vespera: What's In The Box?
Vespera, along with its tripod and included accessories are shipped in one big box. We received a second box as well for this review which included a Vespera backpack, and different filters which we'll talk about further down this post!
The first thing that will surprise you when opening the box is how thin Vespera is. It looks even smaller in person than in pictures, and only takes a third of the box's width!
In the box we received:
Vespera
A protective sleeve
A welcome pamphlet
The tripod
The Vespera magnetic charger cable
A bubble level
In the box that came with the backpack we received:
A Vespera-designed backpack
A light pollution broadband filter
A narrowband dual-band filter
A solar filter
A hygrometer (used to measure the humidity level and prevent moisture on the lens)
The Tripod

The Tripod that comes with Vespera is different than the one included with Stellina. This one is much thinner, and its legs do not extend. If you are wondering if this is a good or a bad thing, we personally never bothered extending the legs of the tripod when we used Stellina, as we preferred to keep it safe low to the ground, so the height of the tripod honestly doesn't matter in our opinion.
The tripod comes in four detachable parts (three legs and one base) which need to be screwed together before use. If you plan to use Vespera every night, we suggest just leaving the tripod attached to the telescope so that you are virtually no setup time at all whenever you want to image. There is no way to retract the legs close together so you would have to leave Stellina on the ground somewhere in your home if you decide to leave the tripod attached.
An optional adjustable tripod is also available to purchase on the side for $149 if you'd like.
The Backpack

An optional purchase that we recommend if you plan on buying Vespera is the backpack.
The backpack has been specifically designed for Vespera, and will make carrying the telescope around much easier. The backpack is a must for anyone planning to take Vespera on a plane.
The backpack has zipper pouches and compartments inside to place Vespera and any accessories (filters, tripod, etc) safely.
Despite being designed for Vespera, the backpack can also be used as an overall photography bag thanks to its moveable compartments.

The Box

How do you carry Vespera around if you do not have the backpack?
Luckily, as it was the case with Stellina, Vespera comes in a box that has a strong built-in handle on top, which can be used to easily carry the telescope and its accessories around. We still suggest purchasing the backpack if you intend on taking Vespera out on the field most of the time!
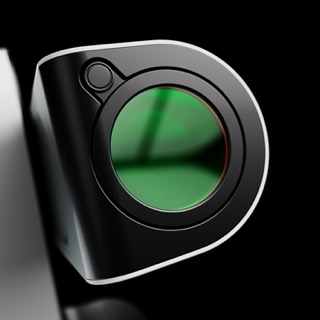
The Filters
Another optional set of accessories you can add to Vespera are filters. We were able to try the following three filters:
Broadband Light Pollution filter
Narrowband Dual-Band filter
Solar filter

The filters are very easy to attach and remove, as all you need to do is snap them to the optical tube.
In case you are unsure as to when to use which filter, let us clear things out for you:
The light pollution filter should be used when imaging from a place with light pollution (your backyard if you live in the city, or any place from Bortle 9 to 5. Learn about Bortle zones HERE). You should use this filter when your target is a cluster, a galaxy, or certain types of nebulae that are not emission (mostly reflection and dark nebulae).
The dual-band filter should be used when you are imaging from either light pollution, or even from a dark site if your target is rich in hydrogen alpha and oxygen III gases (almost all emission nebulae, as well as many planetary nebulae and supernova remnants). Do not use this filter for clusters and galaxies, unless you are an advanced astrophotographer and are trying to capture specific data, for example, hydrogen alpha from a galaxy like M106 or M33.
The solar filter should be used when imaging the sun. Do we really need to say more about this one?
Left: Vespera with a filter attached. Right: Omega Nebula in Narrowband


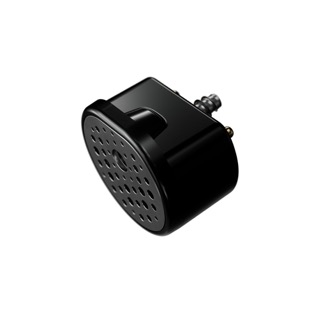
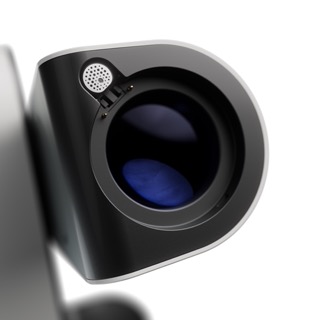
The Hygrometer
Costing an extra $99, the hygrometer is a very small device that measures the level of humidity in the air in real-time. It attaches next to Vespera's lens and will help prevent moisture from forming on the optics. We personally do not need to use this because we live in a very dry city (Las Vegas, surrounded by desert) but you should consider it if you live in a humid climate.
Below you can see what the hygrometer looks like (left) and how it attaches by the lens (right).


Vespera: Specs and Price
Let's now discuss the full specifications of Vespera and how much it costs.
The lens is an Apochromatic quadruplet with lanthanum glass. This ensures that the colors of your stars and main target are natural and free of chromatic aberration. Vespera has an aperture of 50mm (1.97 in) and a focal length of 200mm (7.87 in). It has a fast focal ratio of f/4.
It comes with an IMX 462 CMOS Sony sensor that has a resolution of 2 Million pixels (1920 x 1080 pixels). It has a field of view of 1.6° x 0.9°.
Specs comparison between Vespera and Stellina
| Sensor | Aperture | Focal Length | Focal Ratio | Resolution |
|---|---|---|---|---|---|
Vespera | Sony IMX462 | 50mm | 200mm | f/4 | 1920x1080 |
Stellina | Sony IMX178 | 80mm | 400mm | f/5 | 3072x2080 |

Vespera can save the images in .JPEG, TIFF and FITS format which allows you to process the image to your liking on the computer if you wish.
Vespera works with an alt-azimuth mount, which you might find surprising as deep sky astrophotography normally requires a German equatorial mount to correctly take long exposure shots. Being on an alt-azimuth mounting plate allows the AI built into Vespera to automatically align itself with the pole star. This means you can place Stellina anywhere on the ground, without having to worry about any polar alignment. You can also pick up the telescope at any time and move its location, and it will re-align itself. The automatic alignments are done using plate-solving, and the exposure shots on the alt-az mount are short enough that no trailing appears on the stars. Unlike Stellina, Vespera does not have an integrated field derotator.
Another task that is done automatically by the computer is focusing. Vespera will focus at the beginning of the session, and periodically re-focus its lens throughout the night.
At the time of writing this review, Vespera costs $2,499 + tax in the United States and is available for purchase at Agena Astro. It costs 2 499 € in Europe. $2.5K may not sound "affordable" like the title says, but remember that this is an all-in-one unit, which includes the camera, mount, computer, and more. Therefore, we believe that the price is affordable for what is included.

Size, Weight & Setup of Vespera
Weight: 11 lb
Height: 15 in
Width: 8 in
Depth: 3.5 in
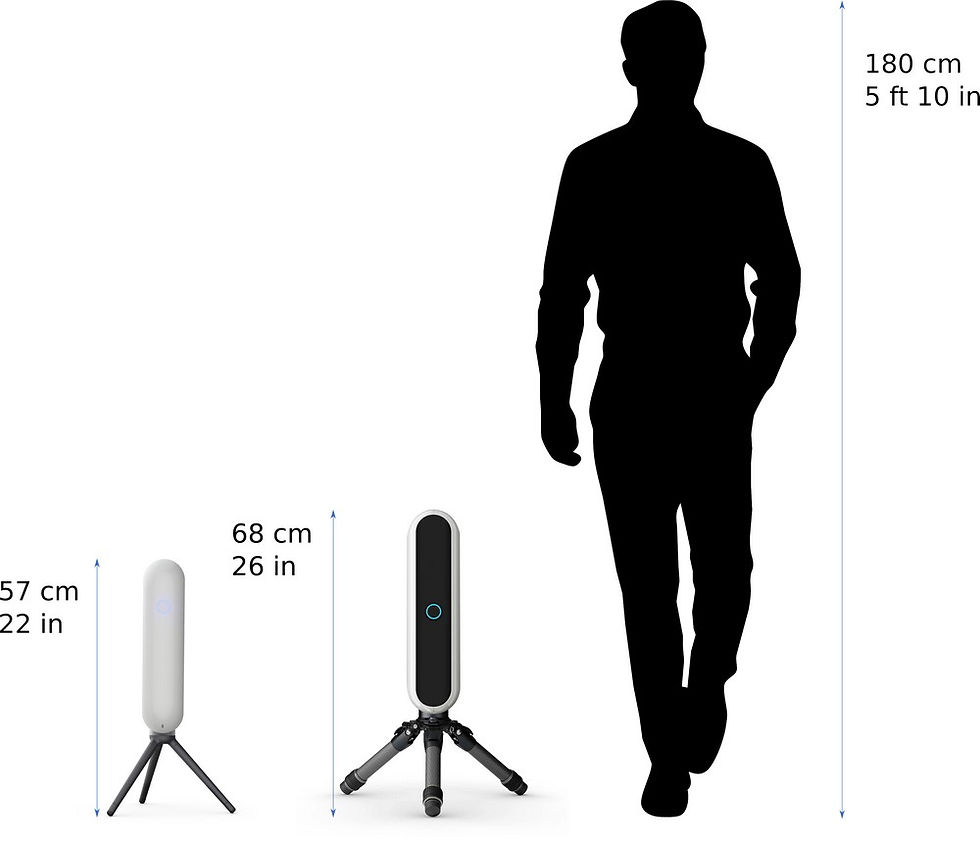
Vespera weighs 11 pounds (5 kilograms) making it very lightweight and portable! It has a size of 15 x 8 x 3.5 inches (40 x 20 x 9 centimeters).
It will fit in most any bag, although the Vespera-designed bag is recommended to nicely fit the telescope and all the accessories.
It is light enough to be taken on a long hike or on a plane, which is great if you like to travel often!
Dimensions comparison between Vespera and Stellina
| Weight | Height | Width | Depth |
|---|---|---|---|---|
Vespera | 11 lb | 15 in | 8 in | 3.5 in |
Stellina | 24.7 lb | 19 in | 15 in | 4.7 in |
How to set up Vespera?
Setting up Vespera is as easy as setting up Stellina, although there are a couple of minor differences due to the change of tripod.
First, grab the three legs of the tripod and the base, and assemble it together. You can then place it anywhere on the ground. We suggest an open area with the view on the sky being as open as possible.
Next, take Vespera out of its protective sleeve, and screw it on top of the tripod firmly.
You can now stick the magnetic bubble level under one of the sides of the telescope.
Check that the bubble level is centered, and be sure that Vespera is on flat ground. This is important for all the plate-solving calculations the telescope will do before imaging.
And that's it! Vespera is now mounted and ready for the night! Once it is dark, you can go ahead and open up the Singularity app on your phone or tablet, and connect to Vespera through the WiFi. You then just have to follow the instructions to start capturing deep-sky objects.

Singularity: A Complete App to Control Vespera
Singularity is the app you'll be using to plan and take images of the night sky! It works with both Vespera and Stellina, and likely will also be the app to use for any future product Vaonis releases. Using Singularity will allow you to get recommendations on objects to image depending on your location and the date, slew to any deep sky object in the sky, see the live stacking of your images in real-time, connect with others, schedule observations, and more.
Singularity is free, user-friendly, and is made up of four tabs.

The first tab is the Initialization tab, where you will input your location and connect to Vespera. Several locations can be saved, for example, if you have an observatory somewhere or sometimes image away from home.
At the top of the page, you will see the current weather conditions and moon phase at a glance. You can extend this section to see a five-day forecast and some useful graphs. Under the weather section, you will find some information about current events, like comet pass-bys or meteor showers. You can click on "Add to Calendar" if you are interested in a particular event and it will be saved to your calendar in the app.
The main button on the page is to connect to Vespera (or Stellina) through Wifi. Once connected, you can then initialize the telescope, which will automatically align and focus Vespera in just a few minutes.

The second tab is the Catalog Tab. This tab lists all the objects you can slew to, as well as your favorites, and a "manual" tab to manually slew the telescope anywhere. The catalog is useful to learn about celestial objects and decide what you want to image. Each object has a visibility status, as follows:
Visibility: Good means the object is high in the sky and can be imaged for a while.
Visibility: Bad means the target is rising or is about to set, so it is low on the horizon and not the best time to image.
Visibility: Not visible means the object is not visible at the moment and is below the horizon.

A main window that is not part of the bottom tabs but opens up automatically when launching your pictures is the Imaging window.
This is the main screen you will use when imaging celestial objects. You will be able to see the live stacking happen and your image come to life!
On this imaging hub you will have information about your current target, the total exposure time since you started, and a slider tracking your progress every 10 seconds. It is very fun to play with that slider if you want to see the progress made on the image since the very beginning.
At the bottom, you will find buttons to download your result, get more information, or share the image with the world.

Back to the main four tabs now, let's talk about the third tab which is the Planning tab!
Here, you can create a plan to have Vespera or Stellina automatically image several different objects throughout the night. It is useful for backyard astrophotographers who like to go to sleep while the telescope is doing all the work!
After tapping on "Create a Plan", you will select your location, date, and time. You will then give your plan a name, for example, "Orion and Rosette" if you want to image both of these during the night. You will then see a screen where you can select the targets you wish to photograph, and add as many as you'd like for the night. Each target has information about their visible time in the sky and rise/set graphs to easily compare them with other targets. Once that's done, just save your plan and you are ready for the night!

The last tab is the Profile tab. Here you will see your gallery of images taken with the telescope.
Upon tapping on an image, you will be able to see all the details associated with it, download it, share it online, or delete it.
You will also be able to edit your profile, activate night mode, contact support, and change your settings.
Besides that, this tab is pretty empty, it would be nice to have an extra section where you can see some fun stats, for example, your total integration time, how many nights you used the telescope, or even a map showing all the different locations you did astrophotography from!
Overall, we really love the app and honestly could not find any negative aspects about it. You can tell that Vaonis took their time to ensure the app was free from glitches, and added so much information about the objects in the sky. The implementation of features like the weather or the planning tab is also very welcoming.

The Andromeda Galaxy Astrophotography with Vespera
One of the first targets I decided to shoot with Vespera is the Andromeda Galaxy. Messier 31 is the largest and brightest galaxy in our night sky, and is a great object for beginners. Although it is simple to capture, it can be tricky to process due to its bright core and large spiral arms. I drove 2 hours to a dark site (Bortle 2) in the desert and used Vespera on M31 for approximately one hour and a half. I then went home and transferred the raw data to my computer so that I could process it using PixInsight.
Below, you can see two images of the Andromeda Galaxy using Vespera. They're both the same data, but the left image was downloaded straight from the app while the right image is the result of my manual processing. This shows that even though the built-in processing is nice to have, it is often worth it to manually process the data yourself on your computer!
Left: Auto Processing | Right: Processed on PixInsight


Nebula Astrophotography in Narrowband using Vespera
Now that we've tried a broadband target from a dark site, let's try to photograph some nebulae from the city. Because of the high light pollution present where we live, we attached the dual-band narrowband filter to Vespera's lens before initializing the telescope.
First, let's see what kind of images Vespera can produce with its built-in processing software. The two images below (Fish Head Nebula, Wizard Nebula, and Pacman Nebula) are the JPG images that came straight out of Vespera at the end of each session. We spent approximately 30 to 60 minutes on each target.
As you can see, the result is decent, most of the bright gases in each nebula is shown well, and with natural colors. The built-in processing software seems to struggle to bring out the fainter gases, but that is to be expected especially with such short exposures.
Nebulae processed automatically by Vespera


Let's now take the reigns and process data ourselves using PixInsight. For this, we activate the "Save images (FITS)" and/or "TIFF images" in the settings. We can shoot a new target, then transfer the data to our computer and process it manually.
We decided to image both M16 (The Eagle Nebula) and M17 (The Omega Nebula) for this test, while keeping the narrowband filter on. Processing these images was fun but a little bit tricky due to the noise being apparent and some gradients, mostly because of the bright moon in the sky. The end result is beautiful though, and really shows that processing the data yourself is great in almost every case!
Nebulae processed manually on PixInsight


We then decided to try the mosaic mode of Vespera, and capture both the Crescent Nebula and the Tulip Nebula. We spent about 10 hours of exposure time on both of these, across several nights. We processed the data on PixInsight and... it looks incredible!


Our Premium Astrophotography Course
Want to learn all aspects of astrophotography in the most efficient way possible?
The Galactic Course includes a LIFETIME membership that gives you unlimited access to all current and upcoming astrophotography content. Step into an ever-growing realm of knowledge and learn at your own pace. Make life-long friends and connections with other members, and get tips from instructors that truly care about your journey and progress under the night sky.
Planetary, Lunar, and Solar Imaging with Vespera
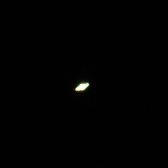
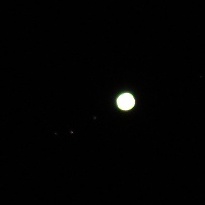
Vespera was not built for planetary imaging, but nothing stops you from slewing to the planet of your choice and taking pictures!
Saturn and Jupiter using Vespera
We have tried photographing Saturn and Jupiter using Vespera, which you can see below. Both planets lack detail and color, and just look like blobs of light. Saturn does show its iconic shape thanks to its rings, and a couple of Jupiter's bright moons are slightly visible near the planet. If planetary imaging is a big thing for you, know that Stellina will do a better job at it than Vespera.
The Moon using Vespera

We aimed the telescope at the moon, and Vespera did a great job here with nice details and natural colors.
The moon is of course a very easy target and so it is not a surprise that the image looks nice.
Looking at the images of the planets above and the moon, we feel like these results are very similar to the results you would get with a DSLR camera and telephoto lens.
The Sun Using Vespera

Important: Be sure to only aim at the sun when the Solar Filter is attached to Vespera!
We have imaged the Sun using Vespera, and it was such an easy process! It took us less than 3 minutes to place Vespera outside, level it, and face it towards the sun. We then turned it on, activated Solar Mode and simply waited for the sun image to appear on the app!
You can see the sunspots very well on the image attached, and we loved the simplicity of solar imaging with Vespera.
Astrophotography Rig vs Smart Telescope
We thought it would be interesting to compare Vespera to a regular astrophotography setup, so let's do it! Note that this comparison is honestly unfair because our current astrophotography setup is made up of a high-quality mount and full-frame 60MP camera.

For this comparison, we will use the Omega Nebula as the target and spend a total of 2.5 hours on it with both setups. The regular Astrophotography rig costs about $10K, but a more fair comparison could be done if using a cheaper telescope, cheaper camera, and a star tracker instead of a mount.
You can see both images below, processed using PixInsight and following the same processing walkthrough.


Smart telescope rig information:
Smart Telescope: Vespera
Filter: Dual-Band Narrowband filter
Total cost: $2,900
Astrophotography telescope rig information:
Camera: QHY600C
Telescope: Radian 75
Mount: ZWO AM5
Guiding: ZWO ASI 290MM Mini
Accessories: Pegasus Astro Pocket Powerbox
Power: Jackery Lithium Battery
Total cost: $10,200 (approximately).
As you can see, the Vespera version is very good, it has plenty of details and is overall impressive. But when compared to the "regular astrophotography rig" version, it is obvious that a lot of the fainter outer gases could not be brought out with Vespera. This is most likely because the exposure times on Vespera are 10 seconds, which isn't that good for faint nebulosity. The 10 minutes of exposure time on the regular rig really helped in displaying all that gas.
Still, Vespera's version is very impressive, especially for the price difference.
Final Verdict
Is Vespera good for astrophotography? What do we like? What do we dislike? Is Vespera worth the cost?

Our conclusion for Vespera will be similar to the Stellina conclusion, we think this is an awesome product for people who do not want to get too deep into the hobby just yet and are looking for an easy, stress-free way to image the night sky. It of course will not beat a dedicated astrophotography rig when it comes to image quality, and also has a lot more limitations, but it still is an impressive telescope all around.
The price of $2,500 is reasonable and feels right considering it is an all-in-one product. Although Stellina has a better aperture and resolution, we actually prefer Vespera much more because of its lighter weight, smaller size, and of course, smaller price tag.
In our Stellina review, we go in-depth about why or why not you should get a smart telescope, and if this would be a good choice for you. We'll keep this review focused on Vespera and assume you already know the ups and downs of such telescopes, but if you need more information to make a decision, be sure to read the Stellina review as most facts also apply to Vespera!
Here are what we believe are the main positive and negative points about Vespera:
POSITIVES:
Ease of use, portability, quick setup
Vespera takes seconds to setup, it does not require any polar alignment or manual focusing, as everything is done automatically during initialization. It is very compact and light, making it perfect for traveling. Vespera is very simple to use and truly is a stress-free astrophotography setup.
Can produce high-quality images
Vespera will save your images are JPG by default, and process them automatically which is great. Some targets will look great right out of the app, but the real magic happens when you export the raw data/master TIFF file and process the image yourself on your computer. For many targets, processing the data yourself will give you a much better result. We were truly impressed with the images we processed, and it was almost hard to believe that this data came from such a tiny telescope!
Singularity App
The app is fantastic. We haven't had a single glitch or crash when using the app, and everything responds very fast. It is full of information about hundreds of deep sky objects, and it feels awesome to be able to select the target of your choice and start imaging it in seconds. It is also nice to be able to slide your finger on the live-stacking bar during imaging and see your image come to life.
NEGATIVES:
It won't beat a full Astrophotography setup in terms of image quality
This is an obvious one, and the same main "con" as Stellina. Please do not expect to get Hubble-like images with a smart telescope like Vespera. These telescopes are getting better and better over time, and we were genuinely impressed with some of the images we were able to capture during this review. Of course, Vespera has its limitation, for example, its Alt-Az mount base design and its non-upgradable sensor, but what it lacks in image quality, it makes up in ease of use and portability!
The built-in Processing
Although it is awesome to have Vespera do all the processing for you, this feature feels like it has so much more to offer and has room to be improved. This is mostly obvious for astrophotographers who are used to processing their own data,
Planets and Some Deep Sky Targets simply don't look good
Vespera wasn't designed for planetary imaging, but rather for deep-sky astrophotography. Its wide field of view is great for medium to large deep sky objects, but not optimal for tiny objects, including planets. Imaging planets and the moon using Vespera is similar to using a telephoto lens on a DSLR camera.
A few tough deep sky objects will not look great, but most of the hundreds of popular targets in the sky are fine!

Interested in adding Vespera to your equipment?
If you would like to purchase this product, you can do so at High Point Scientific!
If you already own this and have taken some great images with it, attach them to the comments section of this post so we can all see your work!
If Vespera is not the right product for you, but you are motivated to start Astrophotography, check out our complete guide on beginner astrophotography equipment!
Our Full Review Video about Vespera
Below you can find our full review video about Vespera, be sure to check it out!
Clear Skies,
Antoine & Dalia Grelin
Galactic Hunter
GALACTIC HUNTER BOOKS


Vespera on sale for the next month, $1999
Starless version of my Lagoon and Triffid Nebula shot from Bortle 3 location, processed with Adobe Lightroom mobile and Starnet to remove the stars
Leona Barratt's Vespera Mosaic made from 392 stacked image on her Vespera from Facebook, captured on Vespera in Bortle 4 skies. I processed her Tiff with Adobe Lightroom mobile, and uploaded a few versions of the processed Tiff with her permission. Beautiful photo from Bortle 4 skies
New Mosaic Mode in Beta, increases Vespera output images to up to 8.4 megapixels depending on the size and framing of the mosaic. Example Lagoon Nebula from Bortle 3, jpeg output unmodified from Vespera
Helix and Lagoon Nebula, taken with Vespera and some adjustments in Adobe Lightroom mobile (jpg output processed)
Eagle Nebula Jpg processed in Adobe Lightroom mobile
Carena Nebula Tiff output processed in Adobe Lightroom mobile
Triffid Nebula - processed in Adobe Lightroom mobile
Sculptor Galaxy - unprocessed jpg output from Vespera
Southern Pinwheel Galaxy - unprocessed Vespera jpg output
Omega Globular Cluster - unprocessed jpg output