


The Challenges of Imaging and Processing Clusters

IMAGING AND PROCESSING CLUSTERS
Clusters have a reputation for being beginner-friendly targets. They're bright, don't need many hours of integration time to look nice, and can be shot with pretty much any rig. But as you spend more and more time imaging and processing them, you'll realize that they have their own set of traps that can catch you off guard.
I've thought about all of the mistakes I made when dealing with clusters over the years, and compiled them below so that you don't have to make them. You can learn much more about clusters and learn how to process any type of cluster in the Star Cluster Processing Guide!
Mistake 1: Exposing too long
This is the most common mistake when dealing with globular clusters.
With nebulae, it's always good to shoot with very long exposures, as long subs mean more signal and less noise, therefore a better result. If you apply that same logic to globular clusters, you'll end up with a bunch of useless, overexposed frames where the center of the cluster is completely blown out. Also, if your exposures are very long and your tracking/guiding isn't perfect, your stars will have some trailing. Minimal trailing is not too terrible for nebulae and galaxies, but the slightest trailing in globular clusters will make your core a complete mess.

What I suggest: Keep your exposures short. For globular clusters, I personally do 30 seconds, maybe 60 if there is no wind and the cluster is not very bright, but never more.
If your guiding isn't showing you a near-perfect graph, guess what, turn it off! Assuming your mount is properly polar aligned, tracking without guiding will give you better results when taking short 30-second subs, as guiding will send signals to the mount, which will move to correct itself when it might not be a need. The stars need to be pinpoint. Great tracking with short exposures is better than non-stop corrections from the auto-guider.
You'll compensate for the shorter subs by taking more of them. For a globular cluster, 120 × 30-second shots is better than 30 × 2-minute.
Mistake 2: Processing the core the same way as everything else
Even if you nail the capture, the globular cluster core will fight you during processing. The brightness range in globular clusters is extreme. Stars within the core and stars in the outer halo can have several magnitudes of difference. You can test that by doing a simple auto-stretch (STF in PixInsight). You'll see that the cluster will either have an overblown core and beautiful outer stars, or a beautiful defined core and very dark stars around.
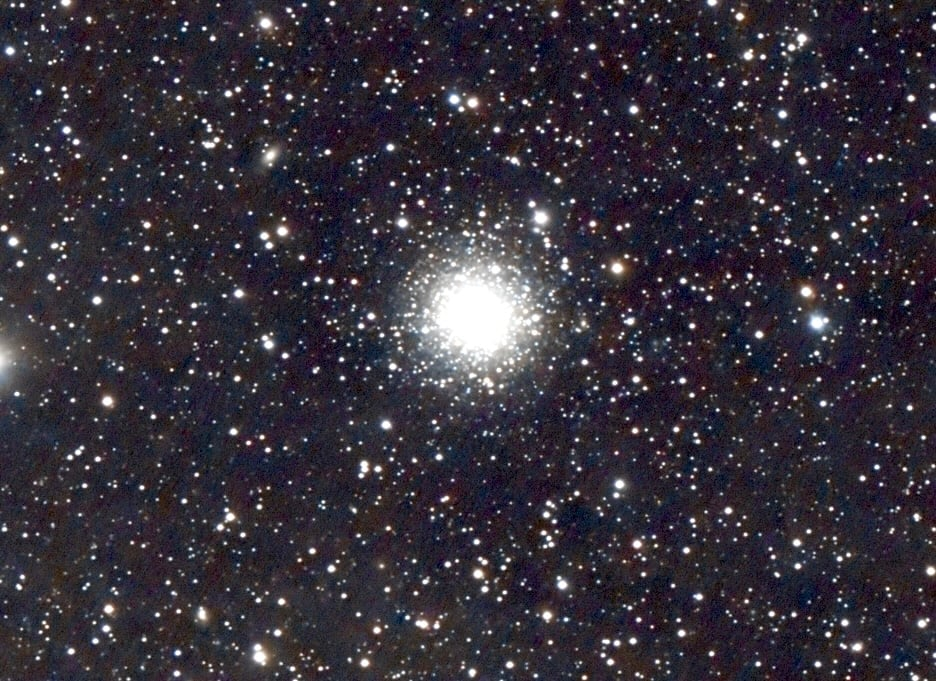
What I suggest: When processing, never ever take your eyes off the core. Well, not litteraly, but what I mean is: After every single step, take a close look at your core and see if it got badly affected by what you just did. If it has, immediately undo the process you applied and try again with different settings.
Don't worry about the background, unless there is something there to reveal, like faint nebulosity. This is very rare for globulars and so it's alway smarter to keep your focus on the core of your object instead. If you do not double check your core every time you apply a process to your image, you'll realize it was impacted too late and will have to go back several steps!
Mistake 3: Panicking when the starless version looks wrong
If you're using a star-removal tool (like the excellent StarXTerminator) as part of your workflow, you'll at some point look at the starless version of your globular cluster and have a minor crisis.
With a nebula, removing the stars gives you with a clean image full of impressive gasses. With a globular cluster, removing the stars leaves you with... almost nothing. Sometimes you'll be left with an ugly white blob that looks completely wrong and makes you feel like you've destroyed your image.

What I suggest: Trust the process. The starless version of a globular cluster is supposed to look strange. The cluster is the stars. The starless layer that remains isn't meant to be a beautiful image without the main target in it. The leftover blob you see is just the core's brightness behind the stars themselves. Once you combine it back with the stars file, it will look just fine! In some extreme cases where it looks pixelized or square, you might want to remove that blob (using CloneStamp for example), but I often leave mine as is to keep the glow within the core natural.
My Star Cluster PixInsight Processing Workflow
If you want to learn how to process absolutely any type of cluster (globular, open, with or without nebulosity...), make sure to check out the Star Cluster Processing Guide! This includes not only a full workflow on a cluster image, but also several additional walkthrough videos on various clusters. It also has raw data, my custom PixInsight process icons, and bonus content.
On top of the processing lessons, there is also a chapter dedicated to learning what clusters actually are, with my tips and advice on imaging them properly. If you already own some of my other courses, you know that this is a straight-to-the-point and easy to understand guide!
Mistake 4: Ignoring the nebulosity in the background
This one is specific to open clusters. It's not really a mistake, but rather a missed opportunity. Being aware of this though will make your final image look much, much better!
Being a nebula lover, all of my favorite open clusters share one thing in common: they have nebulosity near them! The famous Pleiades, for example, are surrounded by the Taurus Molecular Cloud. The Pinwheel cluster (M36), Starfish cluster (M38) and Little Beehive cluster (M41) are all full of hydrogen alpha. The ones sitting on the Milky Way band have all the dust from our galaxy's arm in their background, like M7 or M23. Some other clusters, like M15, are surrounded by faint IFN.

Most people process their open cluster without knowing there is so much more hidden behind and around those bright stars, and end up with images that have so much more potential.
What I suggest: Before you start processing, look up amateur pictures of your target. It can be on websites like Astrobin or social media. Check if others were able to bring out any nebulosity, even if it's super faint. If you see some, or don't but believe that there might be, be more careful during processing. Use masks, or work on the starless image to bring out as much background dust as possible. Treat the starless file like an actual nebula instead of a cluster. Once happy, add the stars at the very end.
Mistake 5: Not protecting the cluster when you reduce other stars
This applies to both globular and open clusters, but it's worse with open clusters because some can end up looking almost invisible if they are not protected.
A good thing to do near the end of your processing workflow is to reduce the size of your stars. This is relevant for pretty much any type of image (cluster, galaxy, nebula, comet). In the case of clusters, which are made of just stars, reducing the stars without the use of a mask will make every visible star smaller.

What I suggest: Create a mask before you run any star reduction. Ideally, it should be a mask that only protects your cluster stars and ignores the rest. The GAME Script for example is an excellent tool to quickly create a mask for this task. It works especially well for globular clusters, but can also be used for open clusters if you tweak it a bit. With the mask applied, your star reduction will only impact the star field, and not your object. It takes a few extra minutes, yes, but it makes a huge difference in the end.
Mistake 6: Forgetting to run SPCC on a target full of reference stars
Star clusters are perfect targets for SPCC (Spectro-Photometric Color Calibration). This is a process that has thousands of color-calibrated reference stars in the frame to work from, which makes its calibration very accurate. If you thought you could skip SPCC because "it's just a cluster", you'd be wrong.

A good SPCC-calibrated globular cluster, for example, will show the true temperature color of its stars. For example, you'll be able to spot the red giants (warm orange), the main-sequence stars (blue-white) and others. Without a good color calibration, your cluster will likely look yellow-ish or plain gray.
Final Thoughts
If you've made any of these mistakes when shooting or processing clusters before, try to fix them, and see how your final results improve!
If you want to become much more familiar with all types of clusters, and know exactly how to process them, check out the Star Cluster Processing Guide on the Galactic Course website.

Clear Skies,
Galactic Hunter


Comments